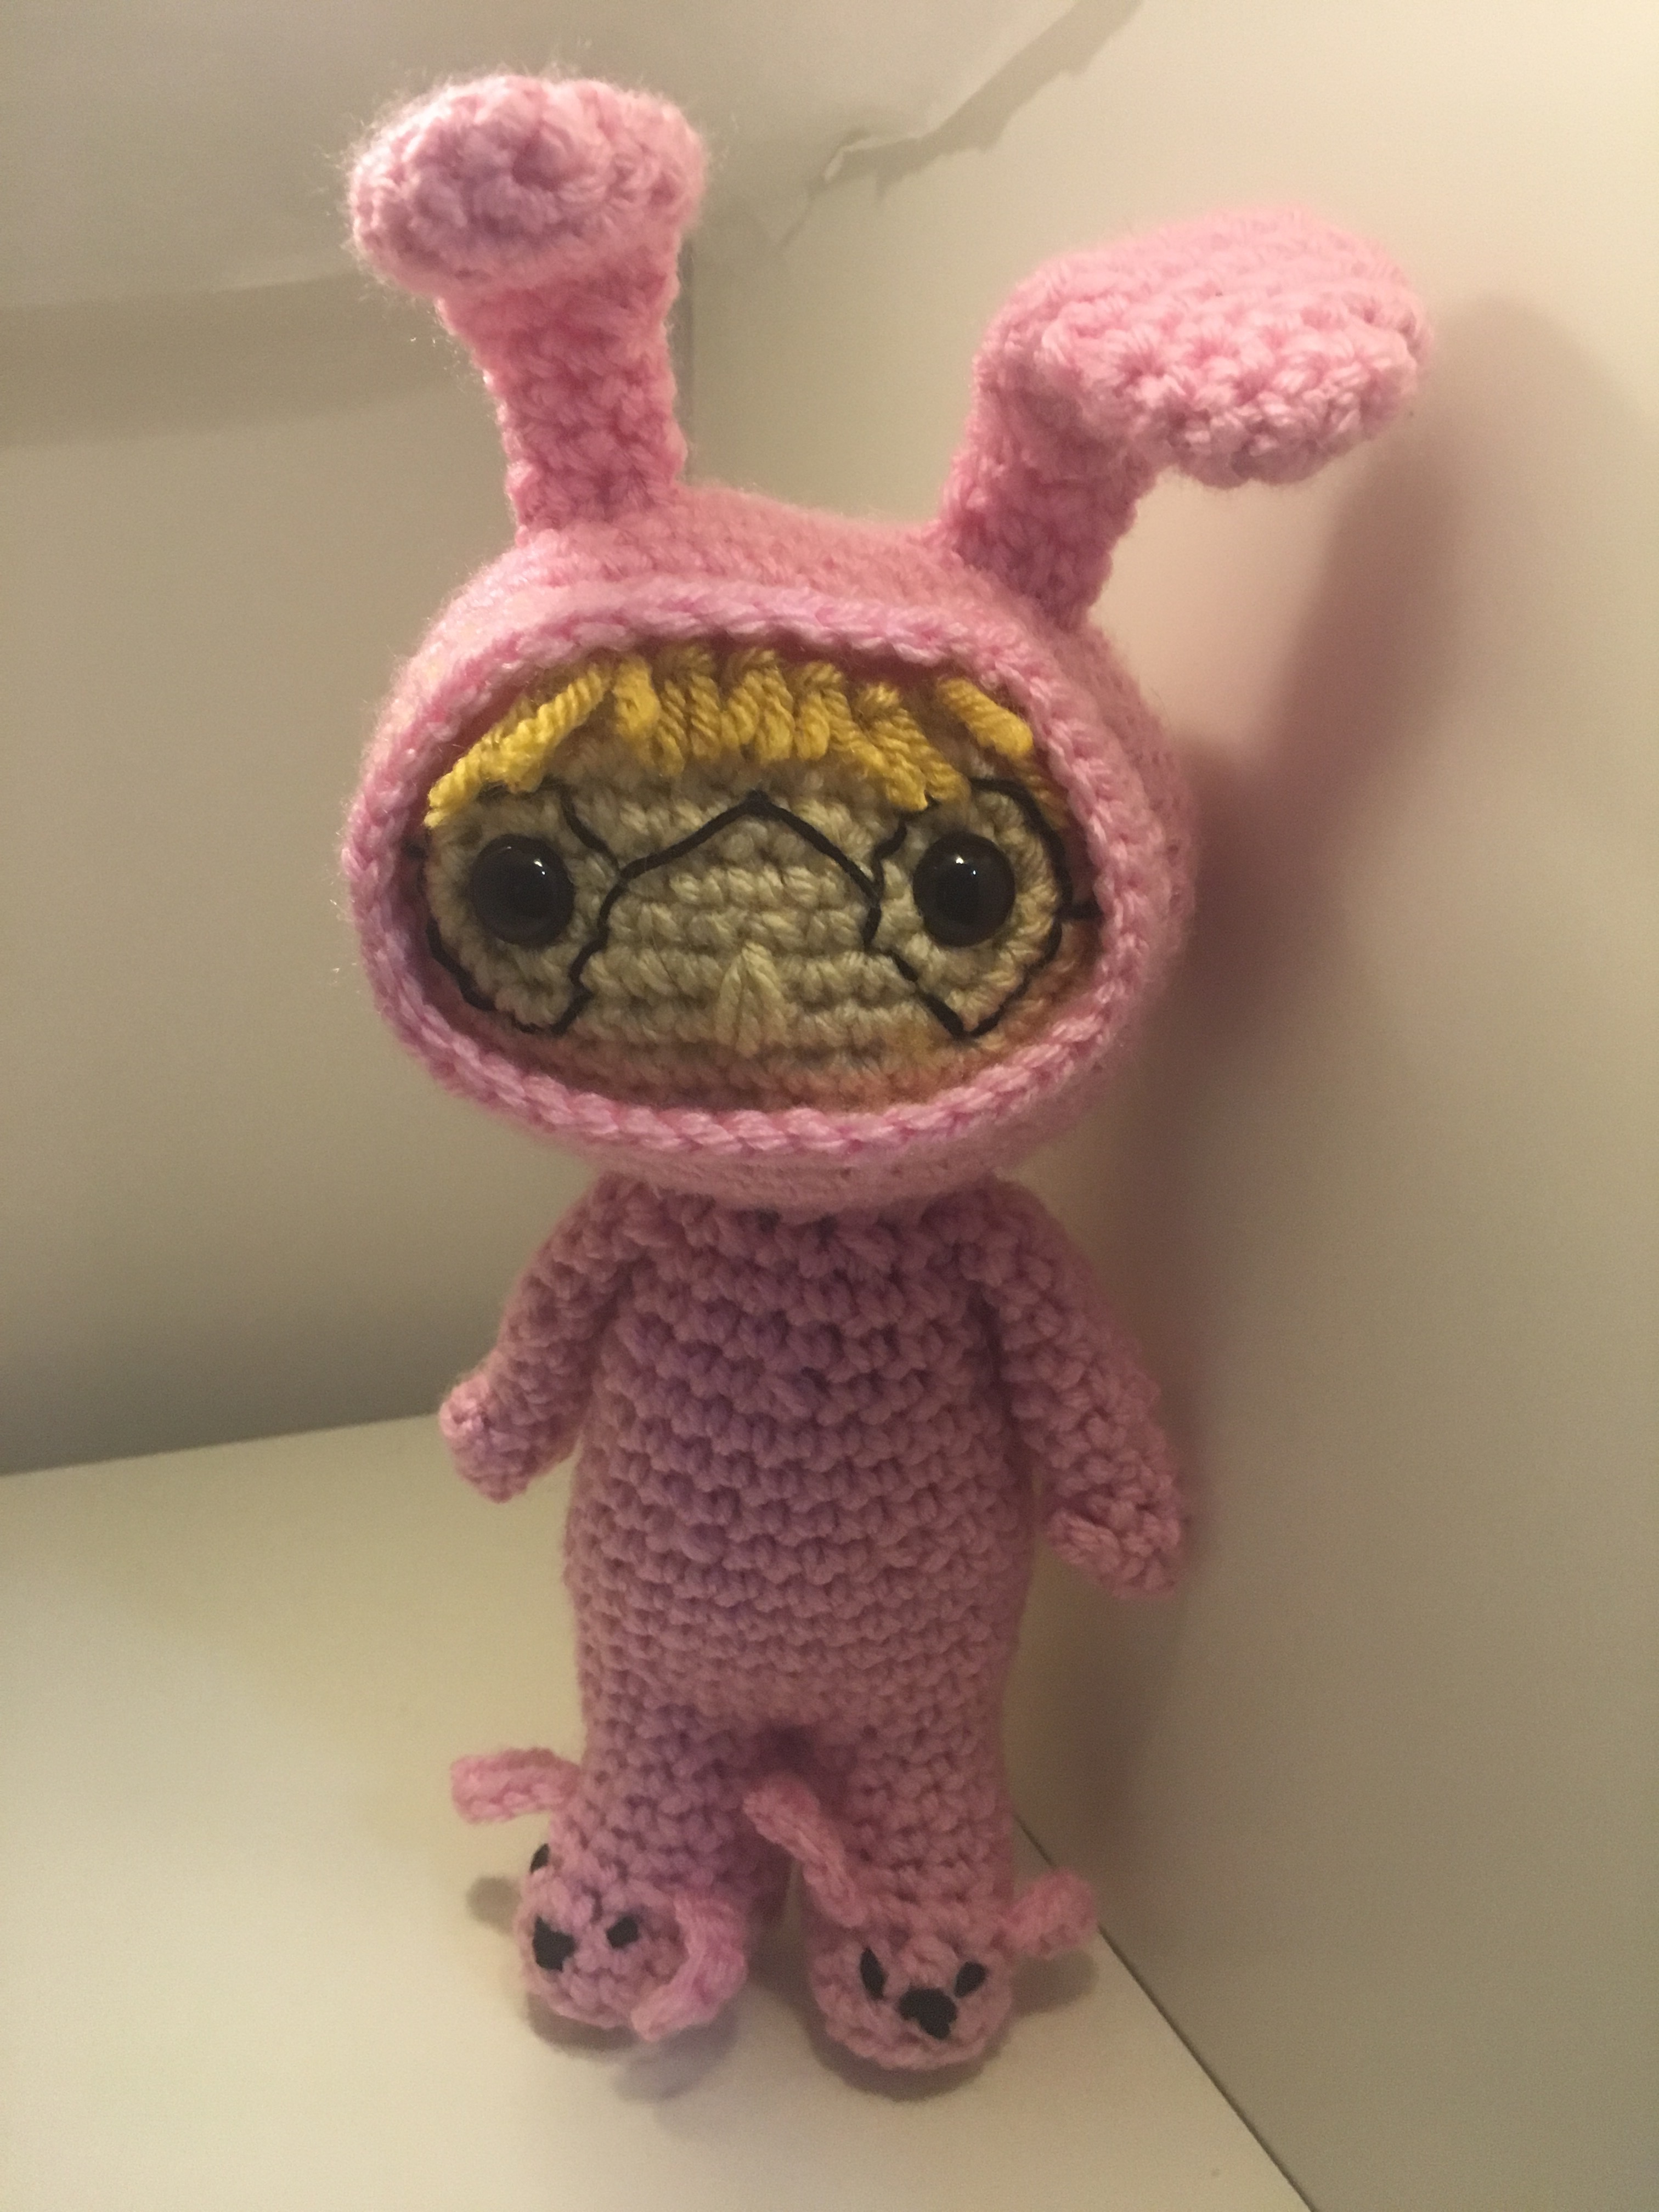
Halloween is over. It’s time to gear up for Christmas, or to just make super cute stuffed dolls because it is fun. Special bonus, he is not Fra-gee-lay.
Here’s Ralphie in his bunny suit because embarrassment is always the best. Remember he hasn’t been completely tested. If you post pictures use #drunkenauntwendy so I can find it. Make sure you click around my site to see all the fun patterns.
Materials
Worsted Weight Yarn
I love this yarn – Pink
I love this yarn – Sungold
Vanna’s Choice – Beige
Black Embroidery floss
Size E crochet hook
Polyfiberfill
Large Eye Needle
Size 12 mm safety eyes
Abbreviations
SC – Single Crochet
HDC – Half Double Crochet
CH- Chain
FO – Fasten Off
SL ST – Slip Stitch
INC – Make two Single Crochet in Same Stitch
DEC – Single Crochet two stitches together
BLO – Back Loops Only
FLO – Front Loops Only
Special Stitches
Puff Stitch – (Insert hook, pull up a loop) repeat 3 times. 5 loops on hook. Yarn over and pull through all loops. Push the stitch out to make a bump on the right side of the fabric.
Note: Almost the entire project is worked in the round. Use a stitch marker or a scrap piece of yarn to mark the beginning of each row. Then you don’t have to count every row. Do not join unless instructed to.
Parentheses indicate a repeat. Repeat the stitches in the parentheses for the number of times indicated.
The bracketed number [] is the number of stitches at the end of each row.
I spread my increases out so there isn’t a seam on the finished piece. If you do not like this method, you can do regular increases.
If you have any questions, please feel free to email me at drunkenauntwendy@gmail.com.
HEAD
Note: Head is initially worked in an oval. The increases are worked only on the sides to maintain the shape.
In Beige
Ch 8
Round 1: SC in 2nd Ch from hook, SC in next 5 stitches. 3 SC in last stitch. Working in the unused loops SC 6. 3 SC in edge [18].
Round 2: 6 SC, 3 INC, 6 SC, 3 INC [24].
Round 3: 6 SC, (SC, INC) 3 times, 6 SC, (SC, INC) 3 times [30].
Round 4: 6 SC, (SC, INC, SC) 3 times, 6 SC, (SC, INC, SC) 3 times [36].
Round 5: in BLOS 7 SC, back to using both loops 2 SC, INC, 3 SC, INC, 3 SC, INC, 6 SC, (3 SC, INC) 3 times Change colors to pink. [42].
Round 6: Work entire row in BLOs, 6 SC, (2 SC, INC, 2 SC) 3 times, 6 SC, (2 SC, INC, 2 SC) 3 times [48].
Stop here, but don’t fasten off.
Cut 2 inch pieces of sungold. Attach to the unused loops from Round 5.
Place safety eyes on the edges of Round 1.
Using Beige and straight stitches embroider a nose.
Using Black Embroidery Floss, embroider glasses.
Rounds 7-13: 7 rows SC [48 stitches per row].
Round 14: (6 SC, DEC) 6 times [42].
Round 15: (5 SC, DEC) 6 times [36].
Round 16: (4 SC, DEC) 6 times [30].
Round 17: (3 SC, DEC) 6 times [24].
Start Stuffing
Round 18: (2 SC, DEC) 6 times [18].
Round 19: (SC, DEC) 6 times [12].
Round 20: DEC 6 times [6].
Fasten off. Thread tail through the loops from Round 19 and pull up tight to close opening.
Finishing Work.
Using Pink, Join with a slip stitch to the unused loops from Round 6. Make sure you are crocheting so the inside of your work faces towards the face.
2 Rounds SC [42 Stitches per row].
Join with a slip stitch.
Fasten off. Weave in ends.
BUNNY EARS (for suit) – Make 2
Note: Ears are worked in the round and then pressed flat.
In Pink, Ch 2
Round 1: 6 SC in 2nd Chain from hook
Round 2: INC in each stitch [12].
Rounds 3-5: 3 rows SC [12 stitches per row].
Round 6: (2 SC, DEC) 3 times [9].
Rounds 7-9: 3 rows SC [9 stitches per row].
Round 10: (SC, DEC) 3 times [6].
Rounds 11-13: 3 rows SC [6 stitches per row].
Fasten off. Fold flat and sew to top of head.
ARMS (Make 2)
In Pink, Ch 2
Round 1: 6 Sc in 2nd Chain from hook [6].
Round 2: SC row [6].
Round 3: SC, Puff Stitch, 4 SC [5 SC, 1 Puff Stitch].
Round 4: SC row
Round 5: (INC, 2 SC) 2 times [8].
Rounds 6-11: 6 rows SC [8 stitches per row].
Fasten off. Don’t stuff so they hang limply.
EARS FOR BUNNY SLIPPERS (Make 4).
In Pink
Ch 5
Row 1: SC in 2nd Chain from hook. SC in remaining 3 stitches [4].
Fasten off. You will sew to the feet prior to stuffing.
LEGS (Make 2).
Note you will make two legs. You will start with bunny slippers for feet. When you finish the 2nd leg don’t fasten off. Proceed to Body instructions. The slippers are also done following the oval increase method.
In Pink
Ch 5
Round 1: SC in 2nd Ch from hook, SC in next 2 stitches. 3 SC in last stitch. Working in the unused loops SC 3. 3 SC in edge [12].
Round 2: 3 SC, 3 INC, 3 SC, 3 INC [18].
Round 3: Working in BLOs, 3 SC, 3 DEC, 9 SC [15].
Round 4: 2 SC, DEC, SC, DEC, 8 SC [13].
Round 5: 11 SC, DEC [12]
Stop here and embroider eyes and nose with embroidery floss. Sew on ears.
Rounds 6-8: 3 row SC [12 stitches per row].
Stuff.
Fasten off first leg, make 2nd leg, don’t fasten off 2nd leg, proceed to body instructions.
BODY
Note body is worked in continuation. Both legs are now crocheted together.
Round 1: Make sure feet face the same direction when attaching them SC around both legs leaving one unworked stitch on each to make the feet face forward. [22]. Sew up hole between two legs.
Round 2: (INC, 10 SC) 2 times [24].
Round 3: (3 SC, INC) 6 times [30].
Rounds 4-7: 4 rows SC [30 stitches per row].
Round 8: (3 SC, DEC) 6 times [24].
Rounds 9-11: 3 rows SC [24 stitches per row].
Start stuffing.
Round 12: (2 SC, DEC) 6 times [18].
Rounds 13-14: 2 rows SC [18 stitches per row].
Round 15: (SC, DEC) 6 times [12].
Fasten off. Sew on arms. Sew to bottom of the head.
Ralphie is all done and ready to shoot his eye out.

For completed plush, patterns and kits check out my Etsy Shop.

Hi! Thank you so much for posting this pattern! My sister is a huge fan of ‘A Christmas Story’, so I plan on making this for her. Approximately how tall is the finished product? Is it small enough to be an ornament? Thanks again!
I love this! I want to make it for my sister, who is a huge fan of ‘A Christmas Story.’ Approximately how tall is the finished product? I’d like to make it as an ornament for Christmas. Thanks!!!
Donna, I’m glad that you like him. As designed he is about 8 inches tall, which would be a pretty big ornament.
I loved making Ralphie as my #quarantinecraft of the day (lol), thanks for the great pattern!
I’m impressed that you are doing a quarantine craft a day. I am glad he turned out.