I’ve been working on some pop culture throwbacks. My favorite so far is this big guy.


It’s Ludo from the classic movie the Labyrinth. I was so excited to make him. Special bonus, this time I managed to make a left and right hand. I am notorious for forgetting to switch the thumbs.
He’s done with Homespun, which isn’t my favorite to work with, but it gives me the best results after I use the slicker brush. He’s being typed and I’ll hopefully have him to testers soon.
Now on to the free pattern.
Free Pattern
It’s a long way to Christmas, but you might want to start making these little ornaments now. At least you can start drinking some bubbly to get the supplies.
There are many more corks to come, I’m thinking I might do Christmas in July and a whole new set of corks. Then in preparation for the best holiday ever (Halloween), I will start with more minis. I may have lost my sketch, but I can always come up with more.
As usual, the free patterns aren’t tested. If you make this one, throw out my #drunkenauntwendy so I can find it on Instagram.
Kits and tutorials are coming.

Materials
Sport Weight Yarn
Black (8 yds)
Other
Size E Crochet Hook
Champagne Cork
Screw eye
Ribbon
Black Sharpie
Light Pink Sharpie
Red Sharpie
Yellow/Gold Sharpie
Epoxy 6000
Gauge: is not important for this project
Abbreviations
SC – Single Crochet
CH- Chain
FO – Fasten Off
INC – Make two Single Crochet in Same Stitch
Note: This is worked in the round. Use a stitch marker or a scrap piece of yarn to mark the beginning of each round. Then you don’t have to count every round. Do not join unless instructed to.
Parentheses indicate a repeat. Repeat the stitches in the parentheses for the number of times indicated.
The bracketed number [] is the number of stitches at the end of each round.
I spread my increases out so there isn’t a seam on the finished piece. If you do not like this method, you can do regular increases.
If you have any questions, please feel free to email me at drunkenauntwendy@gmail.com.
BODY
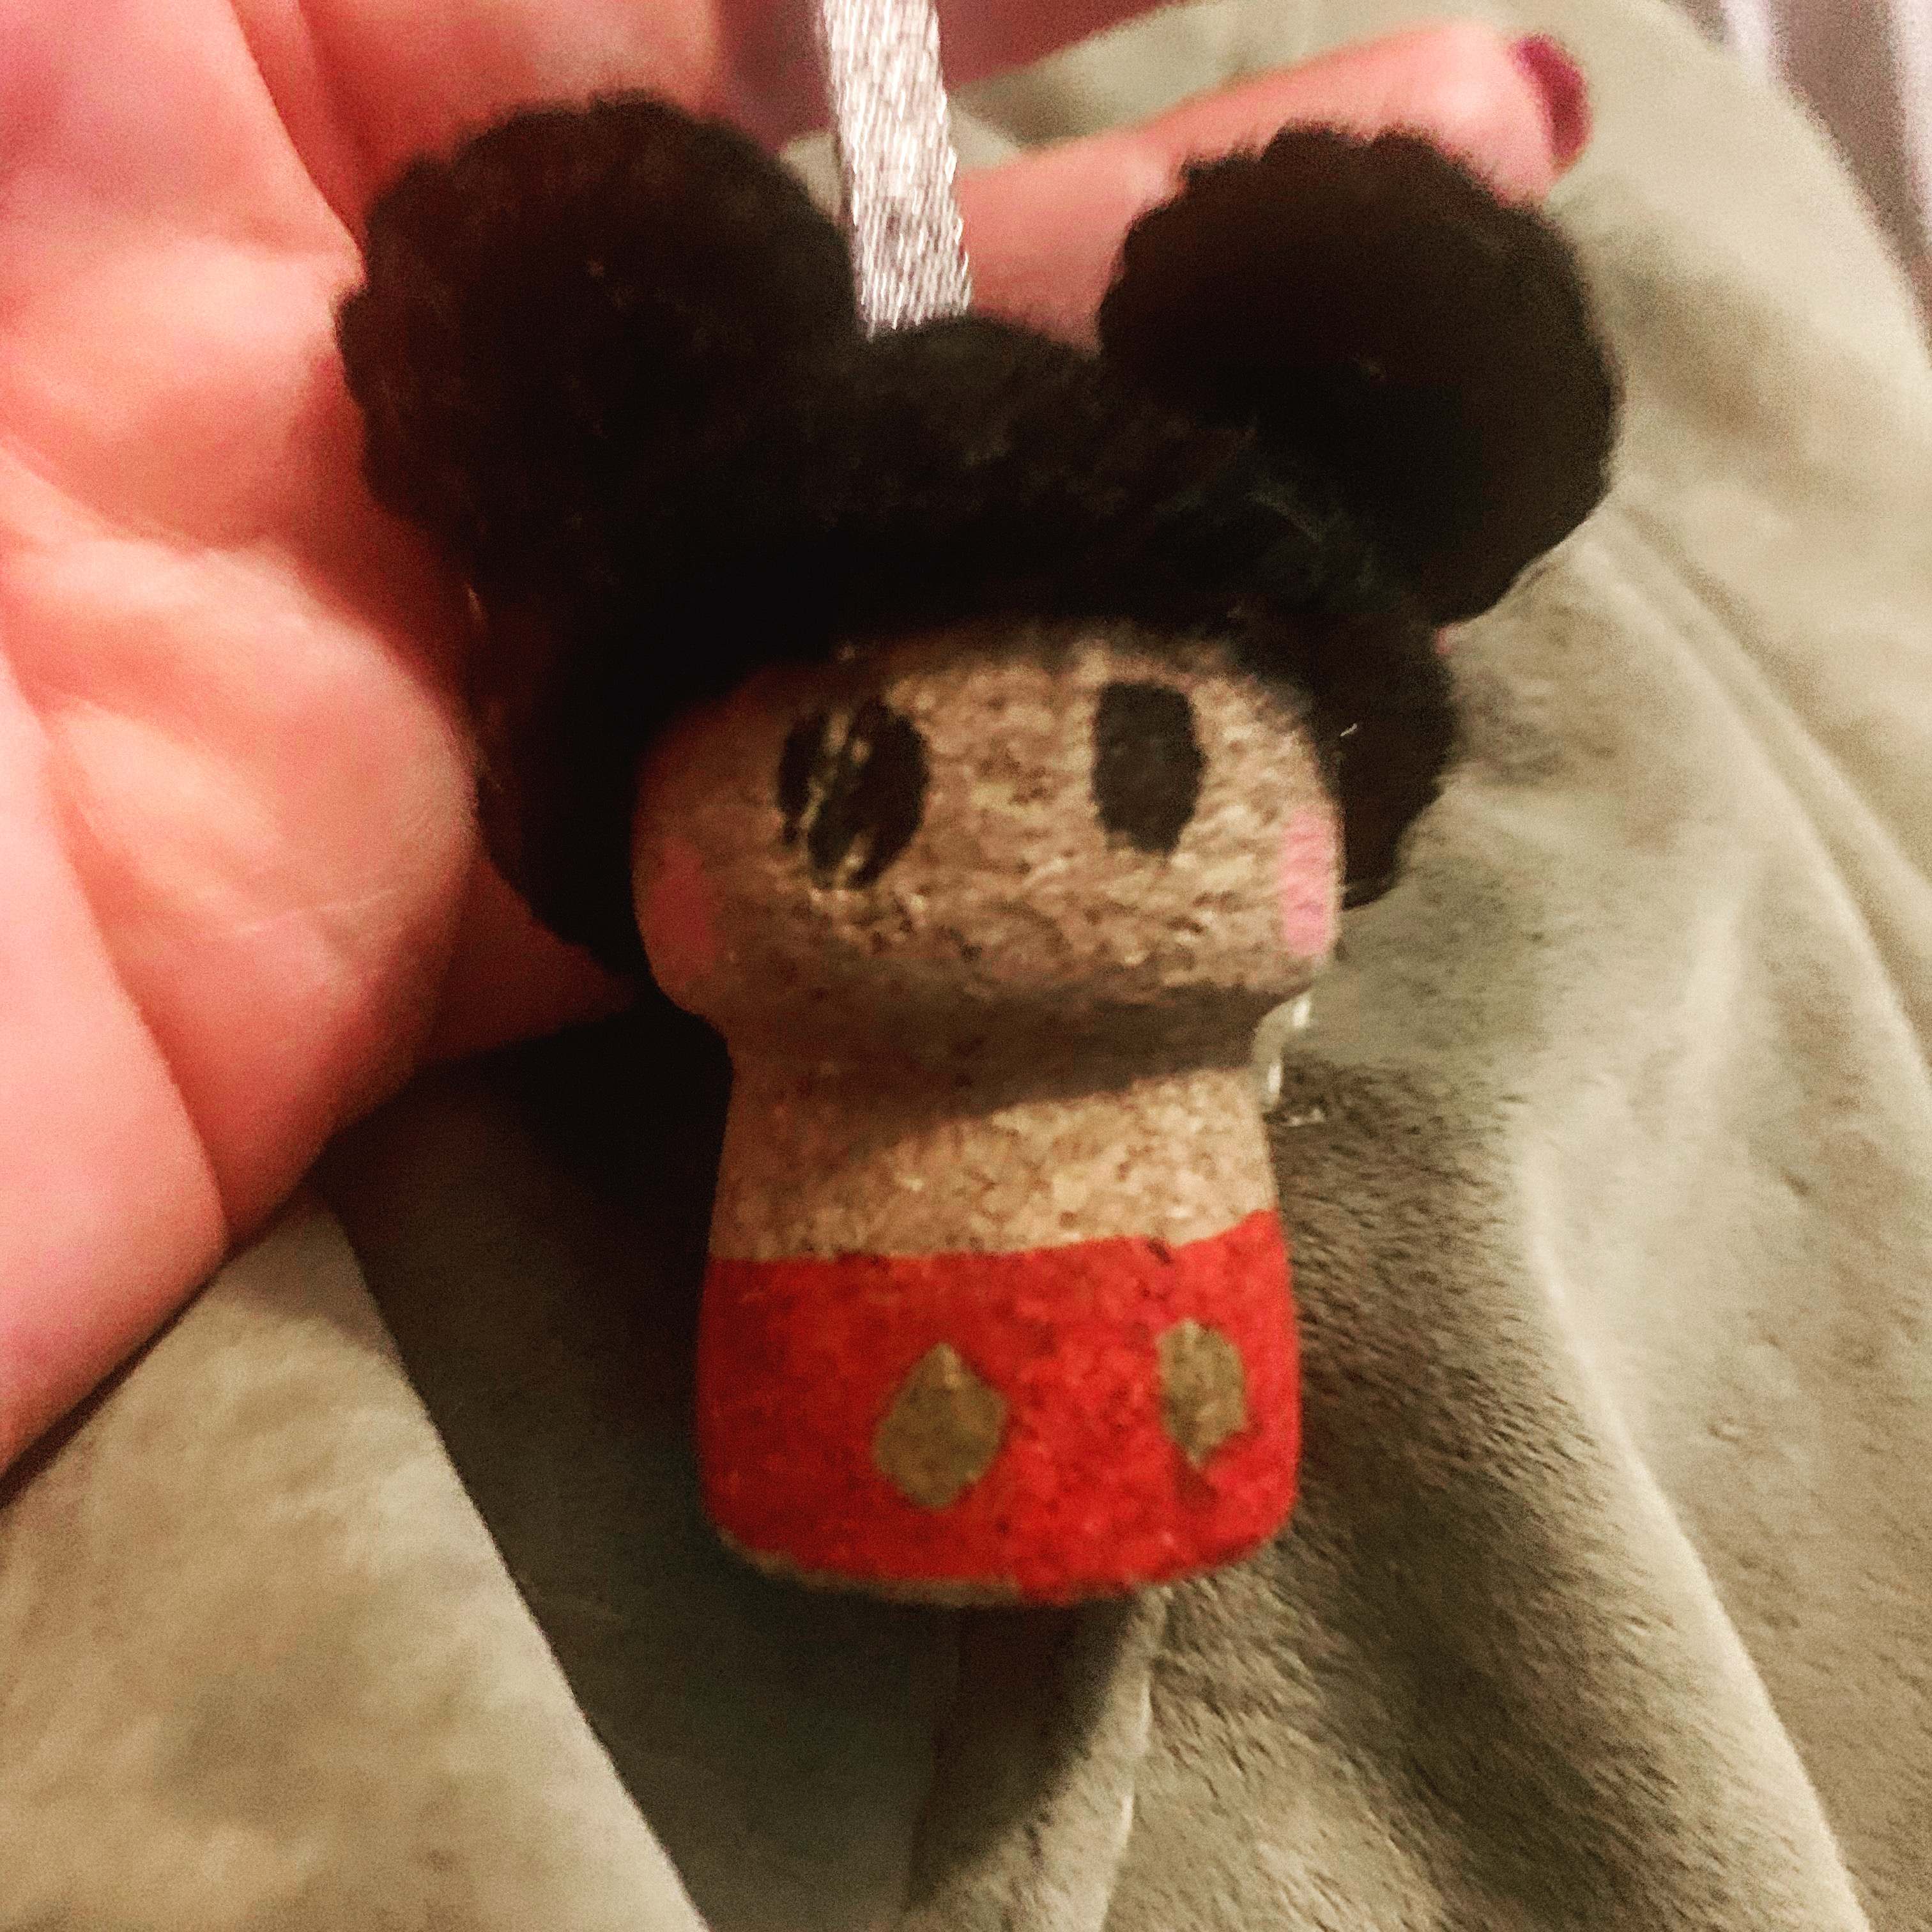
Using your red Sharpie draw a line around the bottom third of the cork. (The top part that acts as the head is about a third for measurement purposes). Pick which side you are putting the face on and try to note the front and the back.
Draw your two buttons on with the yellow/gold sharpie on the front and the back. These are in an oval shape.
Using the guideline previously drawn in red, color in your shorts.
Insert screw hook in the top of the cork.
MICKEY HAT
In black, Chain 2
Round 1: 6 SC in 2nd Chain from hook. [6]
Round 2: INC in each stitch [12].
Round 3: (SC, INC) 6 times [18].
Round 4: (SC, INC, SC) 6 times [24].
Rounds 5-6: 2 rounds SC [24 stitches per row].
Fasten off. Weave in ends
EARS (Make 2)
In Black, Ch 2
Round 1: 6 SC in 2nd Chain from hook. [6]
Round 2: INC in each stitch [12].
Fasten off.
Fold Hat in half to see placement. Sew ears to hat starting at Round 3. Weave in ends
Insert a ribbon through the Screw Eye. Pull the ribbon through the hat and glue the hat down in a few places to the top of the cork.
Use Black Sharpie to make the oval eyes.
Use the Pink Sharpie to make the rosy cheeks.
