I ran a poll on Instagram asking what I should design next. The choice was overwhelmingly Sweet Treats. One of these days, I will get to make the Crocheted Cocktails.
Here’s your free pattern. Make sure to use #drunkenauntwendy if you post on Instagram.
Materials
Yarn in Tan, Pink, Red
Embroidery Floss in Black
Size E Crochet Hook
Poly fiberfill
Glue if you want
Large eye blunt needle
Abbreviations
Ch – Chain
SC – Single Crochet
INC – 2 Single Crochet in designated stitch
DEC – Single Crochet 2 stitches together
DC – Double Crochet
Gauge is not important for this project unless you have purchased a kit. Using the right size hook is important to ensure you have enough yarn.
Notes: Almost the entire project is worked in the round. Use a stitch marker or a scrap piece of yarn to mark the beginning of each row. Then you don’t have to count every row. Do not join unless instructed to.
Parentheses indicate a repeat. Repeat the stitches in the parentheses for the number of times indicated.
The bracketed number [] is the number of stitches at the end of each row.
I spread my increases out so there isn’t a seam on the finished piece. If you do not like this method, you can do regular increases.
If you have any questions, please feel free to email me at drunkenauntwendy@gmail.com.
CONE
In Tan, Ch 2
Round 1: 6 SC in 2nd Chain from hook [6].
Round 2: (INC, 2 SC) 2 times [8].
Round 3: (INC, 3 SC) 2 times [10].
Round 4: (INC, 4 SC) 2 times [12].
Round 5: (INC, 5 SC) 2 times [14].
Round 6: (INC, 6 SC) 2 times [16].
Round 7: (INC, 7 SC) 2 times [18].
Round 8: (INC, 8 SC) 2 times [20].
Round 9: (INC, 9 SC) 2 times [22].
Round 10: (INC, 10 SC) 2 times [24].
Round 11: (INC, 11 SC) 2 times [26].
Round 12: (INC, 12 SC) 2 times [28].
Round 13: (INC, 13 SC) 2 times [30].
Round 14: (INC, 14 SC) 2 times [32].
Round 15: (INC, 15 SC) 2 times [34].
Round 16: (INC, 16 SC) 2 times [36].
Fasten off. Leave a long tail for sewing.
Stuff and sew to Ice cream when it is done.
ICE CREAM
In Pink,
CH 2
Round 1: 6 SC in 2nd Chain from hook [6].
Round 2: INC in each stitch [12].
Round 3: (SC, INC) 6 times [18].
Round 4: (SC, INC, SC) 6 times [24].
Round 5: (3 SC, INC) 6 times [30].
Round 6: (2 SC, INC, 2 SC) 6 times [36].
Round 7: (5 SC, INC) 6 times [42].
Rounds 8-15: 8 rows SC [42 stitches in each row].
Round 16: (DEC, 5 SC) 6 times [36].
Round 17: (Sk stitch, 5 DC in next stitch, Sk Stitck, SC) around.
Fasten off and leave a long tail for sewing.
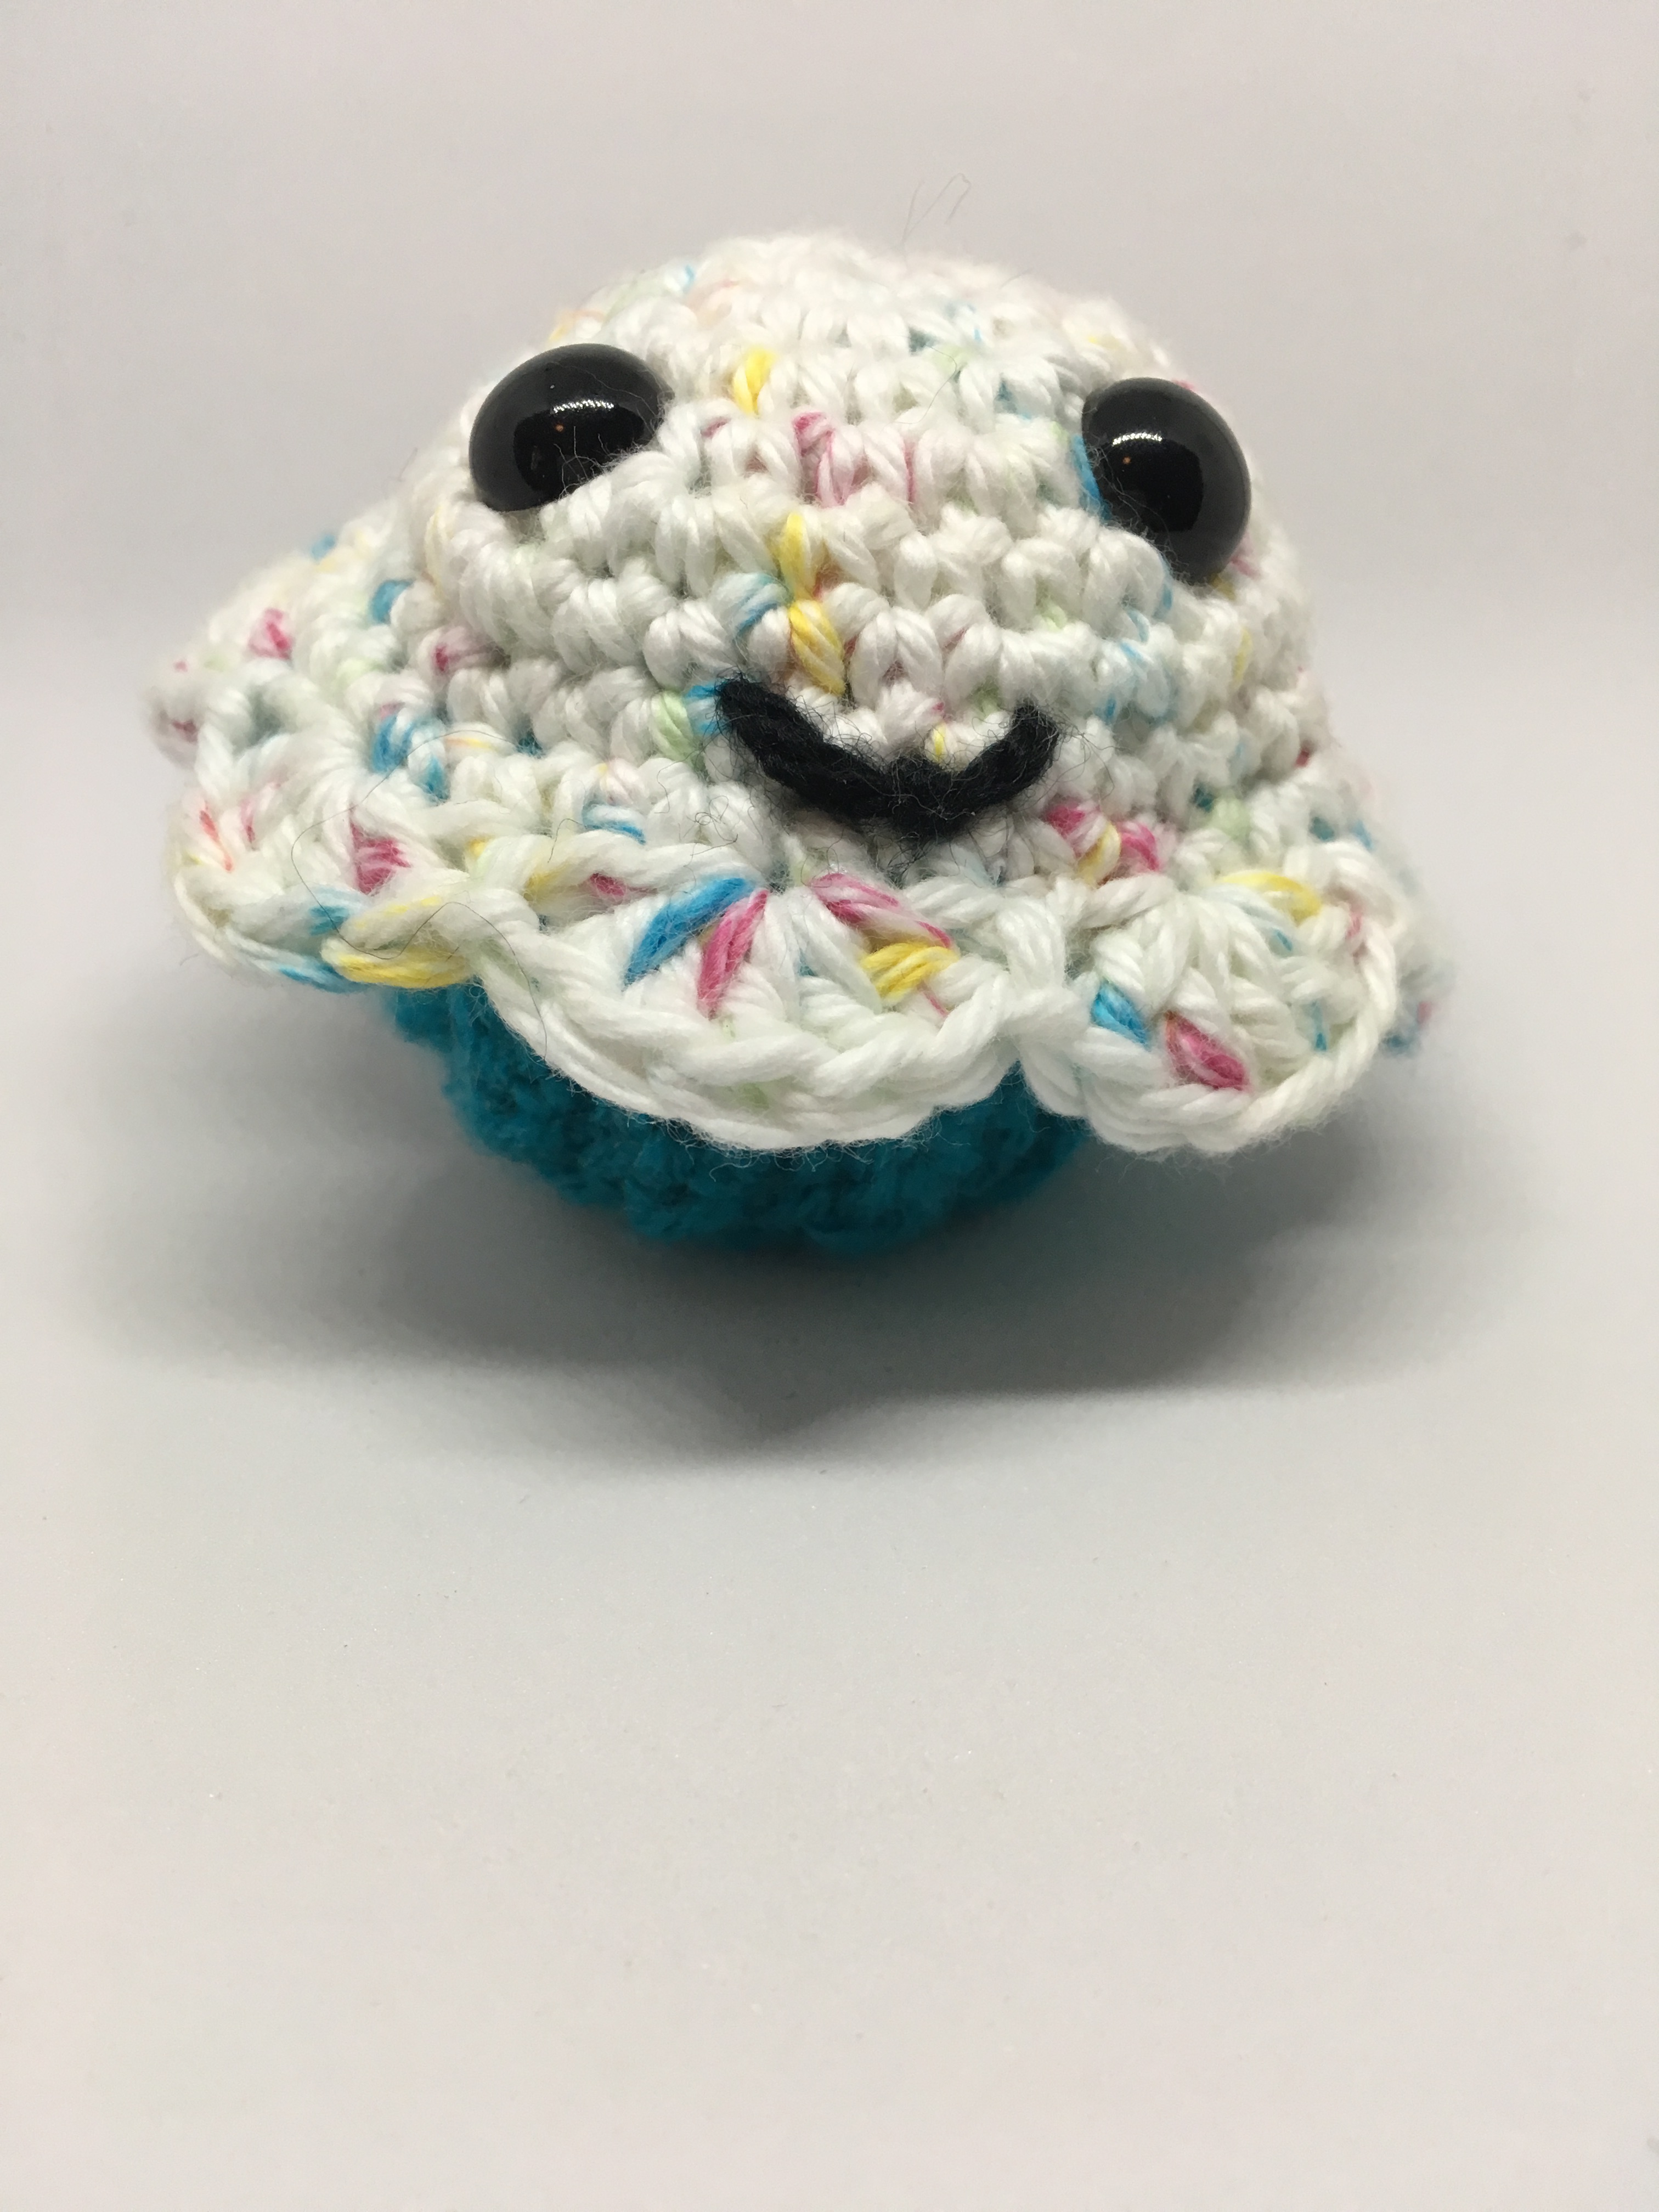
Using embroidery floss, embroider the face using the picture for reference. Double up to make the features show up better.
CHEEKS (Make 2)
In Red
Ch 2
Round 1: 4 SC in 2nd Ch from hook [4]. Slip stitch to join making a circle.
Round 2: INC in each stitch around, slip stitch to join [12].
Round 3: In FLOs (3 DC in 1st Stitch, Slip stitch in next stitch) 6 times, [6 DC, 6 Slip Stitch].