Bride of Frankenstein – Free Pattern

Drunken Aunt Wendy Bride of Frankenstein Crochet

Halloween is almost upon us. I’m done with the mini-monsters and I will be moving on to Mythical Creatures for an online contest. I’m still typing up the patterns on a regular basis. I’ll try to keep to my current schedule and post them regularly.

I’m also teaching myself how to make soap. It was a project with the kids that I am expanding on.

img_3403
Ohio State Soap is a must in my area
img_3397
Christmas Jello soap.

img_3392
Super cute owl soap.
img_3382
First soaps with the kids.

The goat’s milk soap doesn’t take the colors as well. I’m not sure whether I like the goat’s milk vs. the glycerin that is clearer so the colors are brighter. I am also adding scents, but very lightly as I don’t like strong scents.

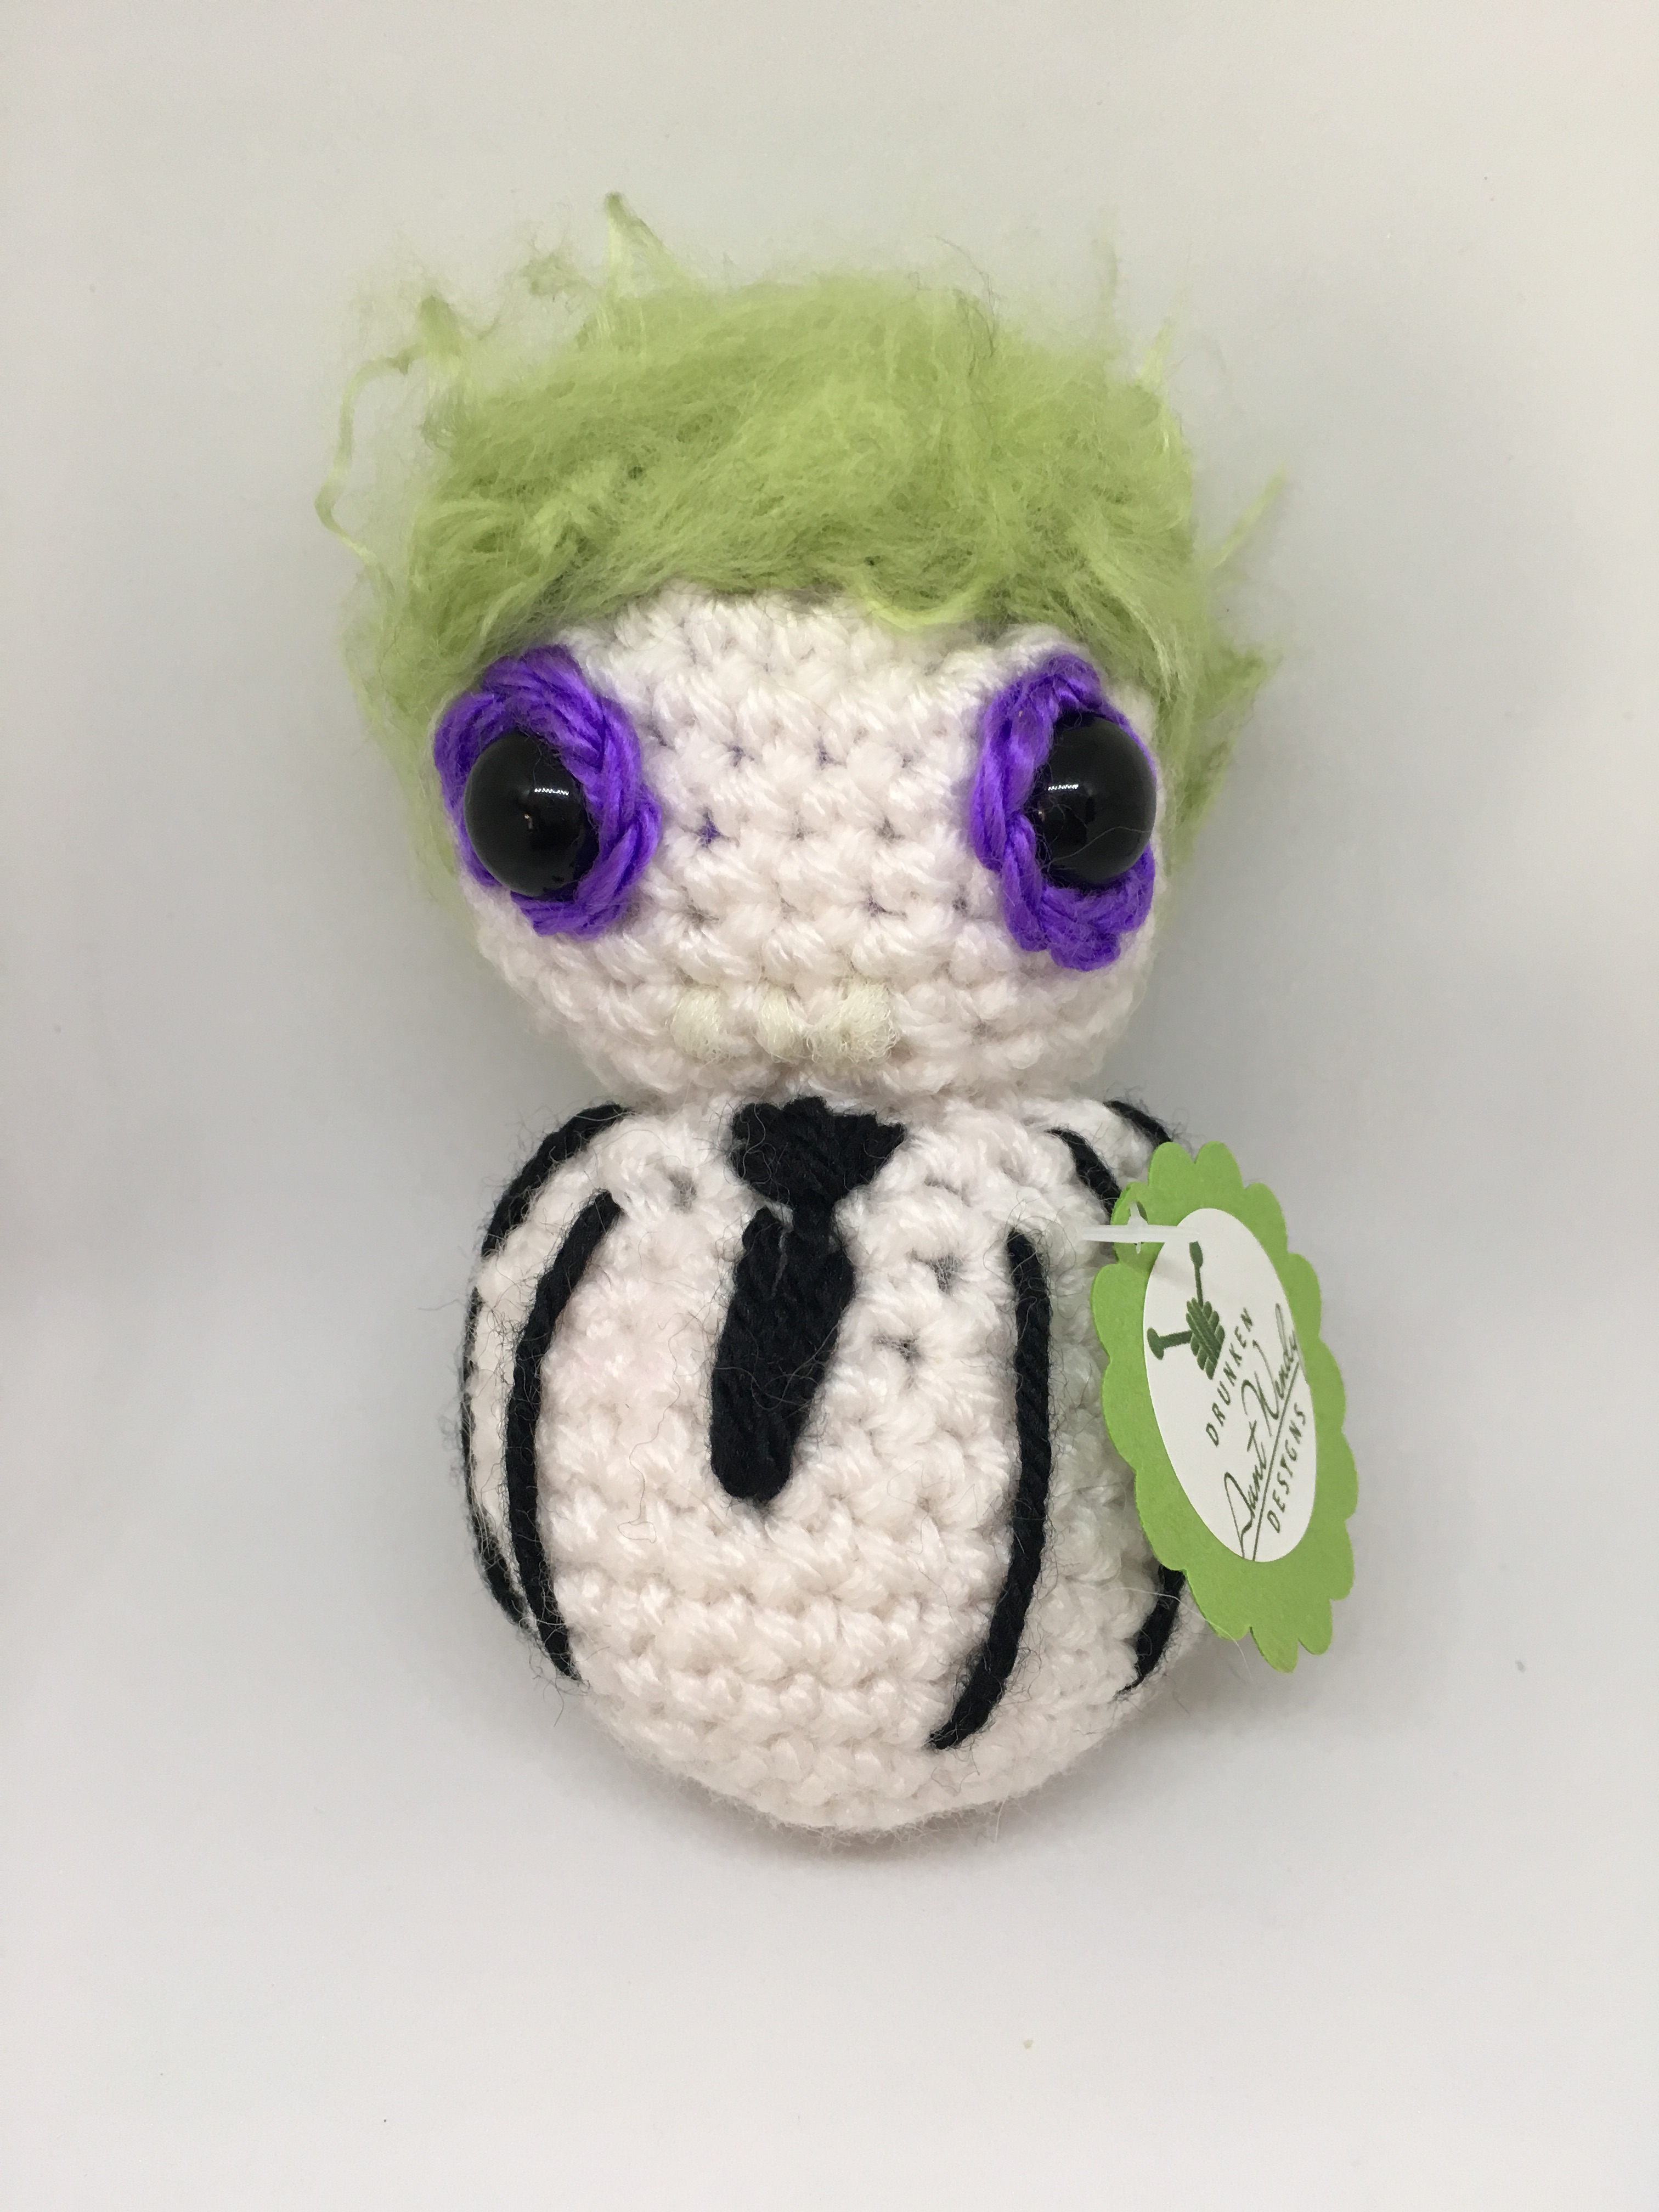
Here’s your Bride of Frankenstein Pattern. Again it hasn’t been tested. Join the mailing list for exclusive content. Use #drunkenauntwendy if you make it so I can find it and give you crochet love.

IMG_3287

Materials
Worsted Weight Yarn
I love this yarn – Black
I love this yarn – Pistache
I love this yarn – White
Red floss
Black Floss
10.5 mm plastic safety eyes
Size E crochet hook
Polyfiberfill
Large Eye Needle

Abbreviations
SC – Single Crochet
HDC – Half Double Crochet
CH- Chain
FO – Fasten Off
SL ST – Slip Stitch
INC – Make two Single Crochet in Same Stitch
DEC – Single Crochet two stitches together
BLO – Back Loops Only

Note: Entire project is worked in the round. Use a stitch marker or a scrap piece of yarn to mark the beginning of each row. Then you don’t have to count every row. Do not join unless instructed to.

Parentheses indicate a repeat. Repeat the stitches in the parentheses for the number of times indicated.

The bracketed number [] is the number of stitches at the end of each row.

I spread my increases out so there isn’t a seam on the finished piece. If you do not like this method, you can do regular increases.

If you have any questions, please feel free to email me at drunkenauntwendy@gmail.com.

Attach to head pursuant to the instructions below.

HEAD – in Pistache
The head is made by doing an oval increase. Sometimes it helps to mark where your increases are going to go with a spare piece of contrasting yarn. Just note that the first row is worked on both sides of the starting chain. The face is then embroidered on before you finish the head and stuff her.

Ch 8
Round 1: SC in 2nd Ch, SC in next 5 stitches. 3 SC in last stitch. Working in the

unused loops from the chain, SC 5, 3 SC in last chain. [18].
Round 2: [6 SC, (INC) 3 times] repeat bracket one more time [24].
Round 3: [6 SC, (SC, INC) 3 times] repeat bracket one more time [30].
Round 4: [6 SC, (SC, INC, SC) 3 times] repeat bracket one more time [36].
Round 5: [6 SC, (3 SC, INC) 3 times] repeat bracket one more time [42].
Round 6: [6 SC, (2 SC, INC, 2 SC) 3 times] repeat bracket one more time [48].
Rounds 7-17: SC in each stitch for 11 rows [48 stitches per row].
Fasten Off. Place eyes between rows 13-14 approximately 8 stitches apart. Using black floss embroider eyebrows and eyelashes. Using red floss embroider a slightly crooked smile.

HAIR
In black, Ch 2
Round 1: 6 SC in 2nd Ch from hook [6].
Round 2: INC in each stitch [12].
Round 3: (INC, SC) 6 times [18].
Round 4: (SC, INC, SC) 6 times [24].
Round 5: (3 SC, INC) 6 times [30].
Round 6: (2 SC, INC, 2 SC) 6 times [36].
Round 7: (5 SC, INC) 6 times [42].
Round 8: (3 SC, INC, 3 SC) 6 times [48].
Rounds 9-16: 8 rows SC [48 stitches per row].
Fasten off. Attach to head at an angle, stuffing well. Using black, embroider a widow’s peak in the center of her forehead. Using White embroider lightning bolts on the side of the hair.

Bride of Frankenstein Crochet

DRESS
In white, Ch 2
Round 1: 6 SC in 2nd Ch from hook [6].
Round 2: INC in each stitch [12].
Round 3: (INC, SC) 6 times [18].
Round 4: (SC, INC, SC) 6 times [24].
Round 5: (3 SC, INC) 6 times [30].
Round 6: (2 SC, INC, 2 SC) 6 times [36].
Round 7: (5 SC, INC) 6 times [42].
Round 8: SC in BLOS [42].
Rounds 9-10: 2 rows SC [42 stitches per row].
Round 11: (5 SC, DEC) 6 times [36].
Rounds 12-13: 2 rows SC [36 stitches per row].
Round 14: (4 SC, DEC) 6 times [30].
Rounds 15-16: 2 rows SC [30 stitches per row].
Start stuffing
Round 17: (3 SC, DEC) 6 times [24].
Rounds 18-19: 2 rows SC [24 stitches per row].
Round 20: (2 SC, DEC) 6 times [18].
Rounds 21-22: 2 rows SC [18 stitches per row].
Round 23: (SC, DEC) 6 times [12].
Fasten off and sew to bottom of head.

ARMS (Make 2)
In Pistache, Ch 2
Round 1: 4 SC in 2nd Ch from hook [4].
Round 2: SC row [4], Change color to white.
Round 3: (SC, INC) 2 times [6].
Rounds 4-7: 4 rows SC [6 stitches per row].

Crocheted Frankenstein and Bride of Frankenstein
Wedded Bliss

Check out my Etsy shop for completed plush, patterns, and kits.

June the Lady Bug – Free Pattern Tuesdays

Crochet lady bug pattern

June is just a super sweet little ladybug crawling around.

This pattern can be completed using the 100% free version right here on this page. However, many people prefer the convenience of a printable, ad-free PDF. The PDF is available in my shop for a minimal fee.


Materials
Worsted Weight Yarn
I Love This Yarn – Firered
I Love This Yarn – Black
Scraps of White
Size E crochet hook
Polyfiberfill
Large Eye Needle

SC – Single Crochet
DC – Double Crochet
CH- Chain
FO – Fasten Off
SL ST – Slip Stitch
INC – Make two Single Crochet in Same Stitch
DEC – Single Crochet two stitches together
Puff Stitch –(Insert the hook in the stitch, yarn over, draw the yarn through the stitch) repeat 2 more times. You should have loops on your hook. Yarn over and draw through all 6 loops on the hook. Push the stitch out.
BLO – Back Loops Only
FLO – Front Loops Only
HDC – Half Double Crochet

Note: Entire project is worked in the round. Use a stitch marker or a scrap piece of yarn to mark the beginning of each row. Then you don’t have to count every row. Do not join unless instructed to.

Parentheses indicate a repeat. Repeat the stitches in the parentheses for the number of times indicated.

The bracketed number [] is the number of stitches at the end of each row.

I spread my increases out so there isn’t a seam on the finished piece. If you do not like this method, you can do regular increases.

If you have any questions, please feel free to email me at drunkenauntwendy@gmail.com

HEAD (black or contrast color)
Ch 2

Round 1: 4 SC in 2nd CH from hook [4].
Round 2: INC in each stitch around [8].
Round 3: (SC, INC) 4 times [12].
Round 4: (SC, INC, SC) 4 times [16].
Round 5: (3 SC, INC) 4 times [20].
Round 6: (2 SC, INC, 2 SC) 4 times [24].
Rounds 7-11: 5 rows SC [24 stitches per row].
Join with a slip stitch and fasten off.

HEAD (black or contrast color)
Ch 2

Round 1: 6 SC in 2nd Ch from hook [6].
Round 2: INC in each stitch [12].
Round 3: (SC, INC) 6 times [18].
Round 4: (SC, INC, SC) 6 times [24].
Round 5: (3SC, INC) 6 times [30].
Round 6: (2 SC, INC, 2 SC) 6 times [36].
*5 sc, inc* 6 times (42)
*6 sc, inc* 6 times (48)
*7 sc, inc* 6 times (54)
*8 sc, inc* 6 times (60)
*9sc, inc * 6 times (66)
*10 sc, inc* 6 times (72),

Join with slip stitch and fasten off.

Top (red or main color)
1. 6 sc in magic adjustable ring
2. 2 sc in each stitch (12 sc)
3. *1 sc, inc (2 sc in stitch)* 6 times (18 sc)
4. * 2 sc, inc* 6 times (24sc)
5. *3sc, inc* 6 times (30 sc)
6. *4 sc, inc* 6 times (36)
7. *5 sc, inc* 6 times (42)
8. *6 sc, inc* 6 times (48)
9. *7 sc, inc* 6 times (54)
10. *8 sc, inc* 6 times (60)
11. *9sc, inc * 6 times (66)
12. *10 sc, inc* 6 times (72)
13-20 8 rows SC
Single crochet top to bottom stuffing as you go. Leave 12 stitches remaining to single crochet top to head (do not fasten off continue to edging after the head is sewn on) stuff head and sew bottom of head to bottom of ladybug.

Edging: continue working around in main color as follows (Sc chain 2, 2hdc in same stitch) skip 2 stitches repeat around.

Antennae (black or contrast) make 2

1. Ch 7,
2. sc in 2nd chain from hook, SC each remaining stitch. Sew to top of head sticking upright
Legs (black or contrast ) make 6 optional

6 stitch I cord for 10 rows and bind off. Sew to bottom under edging.

Finishing

Embroider two white dots on the head to act as eyes.

Embroider a center line across the top in the contract color. I used long straight stitches from the center to each edge.

This is a fun project to change up your colors. You can also use size 14mm safety eyes.

Light Pink and Chocolate Brown adds a fun color combination

Bright Pink with a light blue and the 14 mm eyes.


Chief Featherbrain – Free Turkey Pattern

Crochet Turkey

It is almost the end of October. While I’m still anticipating Halloween, many might be ready for Thanksgiving. This turkey is a fun addition to your Thanksgiving décor or toys.

This pattern can be completed using the 100% free version right here on this page. However, many people prefer the convenience of a printable, ad-free PDF. The PDF is available in my shop for a minimal fee. Want to make him, but don’t have all the supplies? Check out my Chief Featherbrain Kit.


img_2052

Materials

I love this yarn – Brown (160 yds)

I love this yarn – Yellow (35 yds) I love this yarn – Red (25 yds)

I love this yarn – Orange (12 yds) Black Floss to embroider Eyebrows (optional).

18 mm safety eyes Size E crochet hook

Large eye blunt needle

Polyfiberfill
Abbreviations


SC – Single Crochet

Ch- Chain INC – SC 2 stitches into same stitch

DEC – SC two stitches together BLO – Back loops only
Gauge – Gauge is not important for this project, but if you are making it from the kit, you should use the right size needle to ensure you don’t run out of yarn.


Notes:

Parentheses indicate a repeat. Repeat the stitches in the parentheses for the number of times indicated.

The bracketed number [] is the number of stitches at the end of each row.


I spread my increases out so there isn’t a seam on the finished piece. If you do not like this method, you can do regular increases.


Crochet section is worked in partly in the round. Use a stitch marker or a scrap piece of yarn to mark the beginning of each row. Then you don’t have to count every row. Do not join unless instructed to.


If you have any questions, please feel free to email me at drunkenauntwendy@gmail.com.


BEAK – in Yellow

Ch 2

Round 1: 6 SC in 2nd Ch from hook [6].

Round 2: (INC, 2 SC) 2 times [8].

Round 3: (INC, 3 SC) 2 times [10].

Round 4: (INC, 4 SC) 2 times [12].

Fasten off. Fold opening closed and fold in half to sew to head following the instructions below.

WATTLE – in red

Ch 2

Round 1: 6 SC in 2nd Ch from hook [6].

Rounds 2-5: SC for 4 rows [6 stitches per row].

Round 6: 3 DEC [3].

The next portion in worked back and forth, not in the round.

Rows 7-12: Ch 1, SC, Turn for 6 rows [1 stitch per row].

Fasten off and sew to the beak as shown below.

HEAD – in Brown

The head is made by doing an oval increase. Sometime it helps to mark where your increases are going to go with a spare piece of contrasting yarn. Just note that the first row is worked on both sides of the starting chain. The face is then embroidered on before you finish the head and stuff him.Ch 8

Round 1: SC in 2nd Ch, SC in next 5 stitches. 3 SC in last stitch. Working in the unused loops from the chain, SC 5, 3 SC in last chain. [18].

Round 2: [6 SC, (INC) 3 times] repeat bracket one more time [24].

Round 3: [6 SC, (SC, INC) 3 times] repeat bracket one more time [30].

Round 4: [6 SC, (SC, INC, SC) 3 times] repeat bracket one more time [36].

Round 5: [6 SC, (3 SC, INC) 3 times] repeat bracket one more time [42].

Round 6: [6 SC, (2 SC, INC, 2 SC) 3 times] repeat bracket one more time [48].

Rounds 7-17: SC in each stitch for 11 rows [48 stitches per row].

Stop here to insert eyes between rows 12-13 with about 7 stitches between the posts of the eyes.

Sew beak and wattle on as well.

At this time, using black embroidery floss add eyebrows if you wish.

Tie off any strings inside. Start stuffing.

Round 18: (6 SC, DEC) 6 times [42].

Round 19: (5 SC, DEC) 6 times [36].

Round 20: (4 SC, DEC) 6 times [30].

Round 21: (3 SC, DEC) 6 times [24].

Round 22: (2 SC, DEC) 6 times [18].

Round 23: (SC, DEC) 6 times [12].

Round 24: DEC 6 times [6].

Fasten off. Thread tail through the stitches in Round 24 and pull up tight to close opening.


BODY – in Brown

Ch 2

Round 1:  6 SC in 2nd Ch from hook [6].

Round 2: INC 6 times [12].

Round 3: (SC, INC) 6 times [18].

Round 4: (SC, INC, SC) 6 times [24].

Round 5: (3 SC, INC) 6 times [30].

Round 6: (2 SC, INC, 2 SC) 6 times [36].

Round 7: (5 SC, INC) 6 times [42].

Round 8: (3 SC, INC, 3 SC) 6 times [48].

Round 9: (7 SC, INC) 6 times [54].

Rounds 10-19: 10 rows SC [54 stitches per row].

Round 20: (7 SC, DEC) 6 times [48].

Round 21: (6 SC, DEC) 6 times [42].

Round 22: (5 SC, DEC) 6 times [36].

Round 23: (4 SC, DEC) 6 times [30].

Start stuffing

Round 24: (3 SC, DEC) 6 times [24].

Round 25: (2 SC, DEC) 6 times [18].

Rounds 26-31: 6 rows SC [18 stitches per row].

Fasten off, leave a long tail. Making sure the neck is firmly stuffed. Sew to the bottom of the head.


WINGS – in Brown (Make 2)

Ch 2

Round 1: 6 SC in 2nd Ch from hook [6].

Round 2: INC 6 times [12].

Round 3: (SC, INC) 6 times [18].

Rounds 4-6: 3 rows SC [18 stitches per row].

Round 7: SC opening together [9].

Fasten off and sew to the sides of the body, curving them as you attach.


TAIL FEATHERS (Make 5)

In Orange, Ch 2

Round 1: 6 SC in 2nd Ch from hook [6].

Round 2: INC 6 times [12].

Round 3: (SC, INC) 6 times, change colors to yellow in the last stitch [18]. 

Round 4: (SC, INC, SC) 6 times [24].

Rounds 5-6: 2 rows SC, change colors to red in last stitch [24 stitches per row].

Rounds 7-9: 3 rows SC, change colors to Brown in last stitch [24 stitches per row].

Round 10: (2 SC, DEC) 6 times [18].

Rounds 11-15:  5 rows SC [18 stitches per row].

Round 16: (SC, DEC) 6 times [12].

Round 17-21: 5 rows SC [12 stitches per row].

Round 22: SC opening closed [6].

Fasten off and sew them to the back of body, starting with center tail feather, then sew outside feathers.

Sew the feathers to the body as along the sides to help them stay upright.

Sew the last two feathers in the openings behind the first three feathers.

LEG (Make 2) – in yellow

Ch 2

Round 1:  4 SC in 2nd Ch from hook [4].

Round 2:  INC in each stitch [8].

Rounds 3-6: 4 rows SC [8 stitches per row].

Fasten off. Leave long tail for sewing. You will sew the open end to the body after you sew on the toes.

SMALL TOES (Make 2) – in yellow

Ch 2

Round 1: 4 SC in 2nd Ch from hook [4].

Rounds 2-3: 2 rows SC [4 stitches per row].

Fasten off. Sew to bottom of the leg (non-open edge).

LARGE TOES (Make 4) – in yellow

Ch 2

Round 1: 4 SC in 2nd Ch from hook [4].

Rounds 2-6: 5 rows SC [4 stitches per row].

Fasten off. Sew to bottom of the leg (non-open edge), in a Y pattern across from the small toe.

Sew to the body.


Chief Featherbrain is all done and ready for action. Or a Nap!


Beetlejuice – Free Pattern

Drunken Aunt Wendy Crocheted Beetlejuice pattern

He’s the ghost with the most. Did everyone else love this movie as much as I did? And the cartoon? Sometimes I sing Day-O out of nowhere. People might think I’m a bit nuts.

You can’t really tell from this picture, but I gave him glow in the dark teeth. At night he is spooky, but awesome.

If it is your first time visiting my site, join my mailing list for exclusive content, like Chucky. Also, make sure to look around and check out the other patterns. Many haven’t been tested, so let me know if there are problems. There are several other mini-monsters: Freddy, Samara, Jason, Twisty, and Billy.

Now, “Let’s turn on the juice and see what shakes loose.”

Use #drunkenauntwendy if you make him. I would love to see your work.

Beetlejuice
© DrunkenAuntWendyDesigns

Materials

I love this yarn – Black
I love this yarn – Antique White
Caron’s Simply Soft – Grape
Caron’s Simply Soft – Pistachio
Glow in the Dark Yarn (Optional)
12 mm safety eyes
Size E crochet hook
Large eye blunt needle
Slicker Brush
Needlefelting tool
Polyfiberfill

Abbreviations

SC – Single Crochet
DC – Double Crochet
Ch- Chain
INC – SC 2 stitches into same stitch
DEC – SC two stitches together
BLO – Back loops only
FLO – Front Loops only

Gauge – Gauge is not important for this project, but if you are making it from the kit, you should use the right size needle to ensure you don’t run out of yarn.

Notes:
Parentheses indicate a repeat. Repeat the stitches in the parentheses for the number of times indicated.
The bracketed number [] is the number of stitches at the end of each row.

I spread my increases out so there isn’t a seam on the finished piece. If you do not like this method, you can do regular increases.

Crochet section is worked in partly in the round. Use a stitch marker or a scrap piece of yarn to mark the beginning of each row. Then you don’t have to count every row. Do not join unless instructed to.

If you have any questions, please feel free to email me at drunkenauntwendy@gmail.com.

BODY

In Antique White, Ch 2
Round 1: 6 SC in 2nd Ch from hook [6].
Round 2: INC in each stitch [12].
Round 3: (SC, INC) 6 times [18].
Round 4: (SC, INC, SC) 6 times [24].
Round 5: (3 SC, INC) 6 times [30].
Rounds 6-9: 4 rows SC [30 per row].
Round 10: (13 SC, DEC) 2 times [28]. Round 11: (5 SC, DEC) 4 times [24].
Round 12: (4 SC, DEC) 4 times [20].
Round 13: (8 SC, DEC) 2 times [18].
Round 14: SC row [18].
Fasten off.

Using Black, Embroider Long Stripes on the body. Then embroider a small necktie in black as well.

EYE PATCHES (Make 2)
In Grape, Ch 2
Round 1: 6 SC in 2nd Chain from hook, join with a Slip Stitch to make a circle. [6]
Fasten off. Insert posts of eyes through the center of the eye patches before you attach to head.

HEAD

In Antique White, Ch 2
Round 1: 6 SC in 2nd Ch from hook [6].
Round 2: INC in each stitch [12].
Round 3: (SC, INC) 6 times [18].
Round 4: (5 SC, INC) 3 times [21].
Round 5: (6 SC, INC) 3 times [24].
Rounds 6-8: 3 rows SC [24 stitches each row].
Stop here and insert safety eyes. Using the Glow in the dark yarn, embroider teeth. Start stuffing.
Round 9: (6 SC, DEC) 3 times [21].
Round 10: (5 SC, DEC) 3 times [18].
Round 11: (SC, DEC) 6 times [12].
Round 12: DEC 6 times [6].
Fasten off. Attach to Body.

WIG CAP
In Pistachio, Ch 2
Round 1: 6 SC in 2nd Ch from hook [6].
Round 2: INC in each stitch [12].
Round 3: (SC, INC) 6 times [18].
Round 4: (SC, INC, SC) 6 times [24].
Round 5: (3 SC, INC) 6 times [30].
Round 6: (2 SC, INC, 2 SC) 6 times [36].
Round 7: SC row [36].
Fasten off.
Place on back of head and sew into place.

HAIR
Wrap Pistachio yarn around your hand for several wraps. Cut on one side. Using the Slicker Brush, shred the yarn into tufts. Then you use the needle felting tool to attach it. Allow it to be a bit crazy but attach firmly.

Voila


Video Pattern – Samara from the Ring

Drunken Aunt Wendy Crocheted Samara Doll

VHS tapes are rare these days. But if you happen upon an unmarked cassette, make sure you don’t watch it less Samara comes out of the TV to scare you to death.

She’s another part of my mini-monster collection. Other patterns done are Freddy Krueger, Billy from Saw, Jason Voorhees, Beetlejuice, Twisty, and The Babadook. New ones are added each year. Join my mailing list for links to exclusive content. Use #drunkenauntwendy if you post on Instagram.

Follow along with the video to make your own mini monster.

Sergeant Spinner – Free Pattern

Crochet Spider Pattern

Not one of my mini-monsters, but spiders scare the crap out of me.

This might be one of the scariest things I ever made. Those eyes, those legs… EEEEK!

Enjoy this free pattern. Let me know if you like him or if you have problems. Make sure to use #drunkenauntwendy if you post a picture on Instagram.

Mini-monsters are being typed and will be put up as they are completed.

Sargeant Spinner


Materials


I love this yarn – Graymist

I love this yarn – Eggplant
6 9mm safety eyes

Size E crochet hook
Poly fiberfill
Large eye blunt needle


Abbreviations


Ch – Chain

SC – Single Crochet
INC – 2 Single Crochet in designated stitch
DEC – Single Crochet 2 stitches together

DC – Double Crochet


Gauge is not important for this project. If you have purchased the kit, it is important to use the right size hook  in order to ensure you have enough yarn.
Note – this project is worked in continuous rounds. Do not join the rounds.


Notes: Almost the entire project is worked in the round. Use a stitch marker or a scrap piece of yarn to mark the beginning of each row. Then you don’t have to count every row. Do not join unless instructed to.


Parentheses indicate a repeat. Repeat the stitches in the parentheses for the number of times indicated.


The bracketed number [] is the number of stitches at the end of each row.


I spread my increases out so there isn’t a seam on the finished piece. If you do not like this method, you can do regular increases.


If you have any questions, please feel free to email me at drunkenauntwendy@gmail.com.


HEAD

In Eggplant, Ch 8,
Round 1: SC in 2nd Chain from hook, SC in next 5 stitches, 3 SC in last stitch, using the unused loops from the first 6 stitches SC 6 times, 3 SC in the end [18].

Round 2: (6 SC, 3 INC) 2 times [24].
Round 3: {6 SC (SC, INC) 3 times} 2 times [30].
Round 4: {6 SC (SC, INC, SC) 3 times} 2 times [36].
Round 5: {6 SC (3 SC, INC) 3 times} 2 times [42].
Round 6: {6 SC (2 SC, INC, 2  SC) 3 times} 2 times [48].

Rounds 7-17: 11 rows SC [48 stitches per row]

Round 18: (6 SC, DEC) 6 times [42].

Round 19: (5 SC, DEC) 6 times [36].

Round 20: (4 SC, DEC) 6 times [30].

Place Eyes as follows:

2 in between rows 11-12 approximately 2 stitches apart.

4 between rows 13-14, 2 stitches apart spacing the two above evenly.

Start stuffing firmly.
Round 21: (3 SC, DEC) 6 times [24].

Round 22: (2 SC, DEC) 6 times [18].

Round 23: (SC, DEC) 6 times [12].
Round 24: (DEC) 6 times [6].

Fasten off, leave a long tail for sewing. Weave the tail through the last six stitches and pull to close the opening.


MANDIBLES (Make 2)

In Graymist Ch 7

Row 1: SC in 2nd Ch from hook, SC remaining 5 stitches [6].

Fasten off. Sew to the head under the eyes. Twist the mandibles slightly to get the feeler look.


BODY

In Eggplant, Ch 2

Round 1: 6 SC in 2nd Chain from hook [6].

Round 2: INC in each stitch [12].

Round 3: (SC, INC) 6 times [18].

Round 4: (SC, INC, SC) 6 times [24].

Round 5: (3 SC, INC) 6 times [30].

Round 6: (2 SC, INC, 2 SC) 6 times [36].

Round 7: (5 SC, INC) 6 times [42].

Round 8: (3 SC, INC, 3 SC) 6 times [48].

Rounds 9-12: 4 rows SC [48 stitches per row].

Round 13: (6 SC, DEC) 6 times [42].

Round 14: (5 SC, DEC) 6 times [36].

Round 15: (4 SC, DEC) 6 times [30].

Start stuffing firmly.
Round 16: (3 SC, DEC) 6 times [24].

Round 17: (2 SC, DEC) 6 times [18].

Round 18: (SC, DEC) 6 times [12].
Round 19: (DEC) 6 times [6].

Fasten off, leave a long tail for sewing. Weave the tail through the last six stitches and pull to close the opening.

Sew to the bottom of the head.


LEGS (Make 8)

Note 4 legs are made in the color scheme 4 eggplant, 4 graymist, 4 eggplant. The other 4 are made in the reverse 4 graymist, 4 eggplant, 4 graymist. They are sewn on in an alternating pattern on the body.

In starting color, Ch 2

Round 1: 6 SC in 2nd Chain from hook [6].

Round 2: INC in each stitch [12].

Rounds 3-4: 2 rows SC, Change colors [12 stitches per row].

Rounds 5-6: 2 rows SC [12 stitches per row].

Round 7: DEC, DEC, 4 SC, INC, INC, 2 SC [12].

Round 8: SC row, Change Colors [12].

Round 9: DEC, DEC, 4 SC, INC, INC, 2 SC [12].

Round 10 SC row, Change Colors [12].

Round 11: DEC, DEC, 4 SC, INC, INC, 2 SC [12].

Round 12: SC row, Change Colors [12].

Fasten off. Stuff firmly. Sew around the body making sure all the curves of the legs go the same way.


Free Pattern – Ms. Prickles – The Cactus

Drunken Aunt Wendy Crocheted Cactus

Meet Ms. Prickles. Isn’t she just the cutest.

I’m changing things up. I will post patterns here after I type them. They won’t be tested, so if there is an error, I am sorry. Please feel free to let me know.

While you can make this from the pattern below, some prefer the convenience of an ad-free .pdf. You can get that here for a nominal fee.  Want to make Ms. Prickles, but don’t want to buy all the yarn? There’s a kit for that. Finally, want a Ms. Prickles, but you don’t crochet? You can always order your very own plush.

There is another Cactus pattern if you want variety.

Previous .pdfs of older patterns will be removed.

Cacti© DrunkenAuntWendyDesigns
Materials

I love this Yarn – Black (1 yd)
I love this Yarn – Limelight (12 yds)
I love this Yarn – Sungold (12 yds)
I love this yarn – Hot Rose (2 yds)
2 12 mm safety eyes
Size E crochet hook
2.5 inch Terra Cotta Pots
Poly fiberfill
Glue if you want
Large eye blunt needle

Abbreviations

Ch – Chain
SC – Single Crochet
INC – 2 Single Crochet in designated stitch
DEC – Single Crochet 2 stitches together
DC – Double Crochet
BLO – back loops only

Gauge is not important for this project unless you have purchased a kit. Using the right size hook is important to ensure you have enough yarn.

Notes: Almost the entire project is worked in the round. Use a stitch marker or a scrap piece of yarn to mark the beginning of each row. Then you don’t have to count every row. Do not join unless instructed to.
Parentheses indicate a repeat. Repeat the stitches in the parentheses for the number of times indicated.

The bracketed number [] is the number of stitches at the end of each row.

I spread my increases out so there isn’t a seam on the finished piece. If you do not like this method, you can do regular increases.

If you have any questions, please feel free to email me at drunkenauntwendy@gmail.com.

BASE
In Sungold, Ch 2
Round 1: 6 SC in 2nd Chain from hook [6].
Round 2: INC in each stitch [12].
Round 3: (SC, INC) 6 times [18].
Round 4: (SC, INC, SC) 6 times [24].
Round 5: (3 SC, INC) 6 times [30].
Round 6: SC row in BLOs [30].
Round 7: (DEC, 3 SC) 6 times [24].
Round 8: SC row [24].
Round 9: (DEC, 2 SC) 6 times [18].
Round 10: SC row [18].
Round 11: (DEC, SC) 6 times [12].
Round 12: SC row [12].
Stuff
Round 13: DEC 6 times in BLO.
Fasten off. Using a long tail sew up opening. Once you have sewn on the body stuff into the pot. You can glue it in if you want.

BODY

In Limelight CH 2
Round 1: 6 SC in 2nd Chain from hook [6].
Round 2: INC in each stitch [12].
Round 3: (SC, INC) 6 times [18].
Round 4: (SC, INC, SC) 6 times [24].
Round 5: (3 SC, INC) 6 times [30].
Rounds 6-7: 2 rows SC [30 stitches in each row].
Round 8: (DEC, 3 SC) 6 times [24].
Rounds 9-10: 2 rows SC [24 stitches per row].
Round 11: (DEC, 2 SC) 6 times [18].

Insert safety eyes between rows 8 and 9 approximately 7 stitches apart.
Start stuffing.

Rounds 12-13: 2 rows SC [18 stitches per row].
Round 14: (DEC, SC) 6 times [12].

Using black embroider mouth using a straight stitch with a small stitch to make the curve.

Round 15-16: 2 rows SC [12 per row].

Fasten off and sew to base.

BRANCH
In Limelight CH 2
Round 1: 6 SC in 2nd Chain from hook [6].
Round 2: INC in each stitch [12].
Rounds 3-4: 2 rows SC [12 stitches per row].

Start stuffing

Round 5: DEC 6 times [6].
Rounds 6-7: 2 rows SC [6 stitches per row].
Fasten off. Sew to the body at an angle.

FLOWER
In Hot Rose
Ch 2
Round 1: 6 SC in 2nd Ch from hook [6].
Round 2: INC in each stitch around, slip stitch to join [12].
Round 3: (3 DC in 1st Stitch, Slip stitch in next stitch) 6 times, [6 DC, 6 Slip Stitch].

Fasten off. Attach to head above the eye opposite the branch.

KODAK Digital Still Camera


To make her giant, three strands of yarn held together, 25 mm eyes and a 5 inch pot result in a Ms. Prickles that is about 1 foot tall.


Yakko – Free Pattern

Animaniac crochet

If you follow me on Facebook and/or Instagram, you know I have been creating Yakko this week.

This is the initial pattern with the smaller face piece. Hopefully when I make his brother, Wakko and the Warner sister, Dot, I’ll get it right. Then they can run around the Warner Movie Lot.FullSizeRender

He looks a lot cuter with his body.

I haven’t tested this pattern at all. Please let me know if there are any issues with the pattern or suggestions or recommendations.Yakko Pattern

Next week I will be crocheting items from other designers. I like to try other patterns so I can see different takes on things and different ways to make my crochet creatures come to life.

The next few free patterns will be from Animaniacs. Let me know what you think my series after that should be. I was thinking Princess Bride characters. Andre the Giant as Fezzik as a plush doll could be the cutest thing ever.

Sparky and Frostina – Free Pattern

Free Crochet Monster Pattern

Free Crochet Monster Pattern

I think these two might be my favorite. The pictures don’t show how sparkly she is. I also love their expressions and striped arms. Since they are hot and cold, Katy Perry music runs through my head when I look at them.

Look at all this sparkly hair.

dsc_9238.jpg

I also love how long I made the arms.

DSC_9246

Let me know if there are any problems or any of the instructions are unclear. They have not been tested. If you make one use #drunkenauntwendy when posting so I can find it.

Sparky and Frostina, Monsters

© DrunkenAuntWendyDesigns 2015

Materials

Sparky

Worsted Weight Yarn

I love this yarn – Yellow

I love this yarn – Orange Neon

I love this yarn – Fire Red

Sport Weight Yarn

I love this cotton – White

I love this cotton – Black


Frostina

Worsted Weight Yarn

I love this yarn – Soft Blue

I love this yarn – Amethyst

Yarn Bee Fetching – Pewter

Yarn Bee Fetching – Diamond

Sport Weight Yarn

I love this cotton – White

I love this cotton – Black


Size E crochet hook

Polyfiberfill

Large Eye Needle


Abbreviations

SC – Single Crochet

HDC – Half Double Crochet

DC – Double Crochet

TC – Triple Crochet

DTC – Double Triple Crochet

CH- Chain

FO – Fasten Off

SL ST – Slip Stitch

INC – Make two Single Crochet in Same Stitch

DEC – Single Crochet two stitches together

BLO – Back Loops Only

Note: Entire project is worked in the round. Use a stitch marker or a scrap piece of yarn to mark the beginning of each row. Then you don’t have to count every row. Do not join unless instructed to.


Parentheses indicate a repeat. Repeat the stitches in the parentheses for the number of times indicated.


The bracketed number [] is the number of stitches at the end of each row.


I spread my increases out so there isn’t a seam on the finished piece. If you do not like this method, you can do regular increases.


If you have any questions, please feel free to email me at drunkenauntwendy@gmail.com.


BODY

Sparky – Fire Red

Frostina – Soft Blue


Ch 8

Round 1: SC in 2nd Ch, SC in next 5 stitches. 3 SC in last stitch. Working in the unused loops from the chain, SC 5, 3 SC in last chain. [18]

Round 2: [6 SC, (INC) 3 times] repeat bracket one more time [24].

Round 3: [6 SC, (SC, INC) 3 times] repeat bracket one more time [30].

Round 4: [6 SC, (SC, INC, SC) 3 times] repeat bracket one more time [36].

Round 5: [6 SC, (3 SC, INC) 3 times] repeat bracket one more time [42].

Round 6: [6 SC, (2 SC, INC, 2 SC) 3 times] repeat bracket one more time [48].

Note: Switches from oval increase to regular circle increase here

Round 7: (7 SC, INC) 6 times [54].

Round 8: (4 SC, INC, 4 SC) 6 times [60].

Rounds 9-32: SC in each stitch for 24 rows [60 stitches per row].

Round 33: In BLO (DEC, 8 SC) 6 times [54].

Round 34: (DEC, 7 SC) 6 times [48].

Round 35: (DEC, 6 SC) 6 times [42].

Round 36: (DEC, 5 SC) 6 times [36].

Start stuffing. Make sure you stuff firmly enough to hold the shape, but not too firmly that you stretch your stitches

Round 37: (DEC, 4 SC) 6 times [30].

Round 38: (DEC, 3 SC) 6 times [24].

Round 39: (DEC, 2 SC) 6 times [18].

Round 40: (DEC, 1 SC) 6 times [12].

Round 41: (DEC) 6 times [6].

Fasten off. Thread the tail through the opening and sew it up tight.


ARMS – make 2 for each monster

Both monsters’ arms are worked the same, no need to fasten off for color changes. Simply run the unused colors up the inside.


Sparky Stripe Pattern

           2 red

           2 orange

           2 yellow

           Repeat until the last four rows.

           Finish last four rows in red


Frostina Stripe Pattern

           3 Soft Blue

           1 Diamond

           3 Amethyst

           1 Diamond


Chain 2

Round 1: 6 SC in 2nd CH from hook.

Round 2: (INC) 6 times [12].

Round 3: (SC, INC) 6 times [18].

Round 4: (SC, INC, SC) 6 times [24].

Rounds 5-10: 6 rows SC [24 stitches each row].

Stuff only the ball of the arms.

Round 11: (DEC, 2 SC) 6 times [18].

Round 12: (DEC, 1 SC) 6 times [12].

Rounds 13-34: 22 rows SC [12 stitches each row].

SC opening closed with the last used color. Fasten off and leave a long tail to sew them on.

Sew to the arms to the sides of the body hanging low.


LEGS – Make 2

Sparky – Fire Red

Frostina – Soft Blue


CH 2

Round 1: 6 SC in 2nd CH from hook.

Round 2: (INC) 6 times [12].

Round 3: (SC, INC) 6 times [18].

Round 4: (SC, INC, SC) 6 times [24].

Round 5: (3 SC, INC) 6 times [30].

Round 6: In BLO, SC Row [30].

Round 7: (DEC, 3 SC) 6 times [24].

Rounds 8-11: 4 rows SC [24 stitches each row].

Round 12: In BLOs (DEC, 2 SC) 6 times [18].

Round 13: (DEC, 1 SC) 6 times [12].

Start stuffing here

Rounds 14-18: 5 rows SC [12 stitches each row].

Fasten off. Make sure they are stuffed tightly to support the weight of the monster.

Sew to the bottom of the body.


EYES – Make two for each monster

In white

Chain 2

Round 1: 6 SC in 2nd CH from hook.

Round 2: (INC) 6 times [12].

Round 3: (SC, INC) 6 times [18].

Round 4: (SC, INC, SC) 6 times [24].

Fasten off. Stretch to an oval shape before sewing.


PUPIL – Make two for each monster

In black

Chain 2

Round 1: 6 SC in 2nd CH from hook.

Slip stitch to close circle.

Sparky – sew pupils to bottom of oval

Frostina – sew pupils slightly off center looking in the same direction.


Sew eyes to the body. Eyelashes are optional.


HEAD FLAMES

Sparky – Make 1 yellow, 1 orange, 2 red

Frostina – Make one in Pewter and 2 in Pewter for the first 5 rows and Amethyst for the rest.


Chain 2

Round 1: 4 SC in 2nd CH from hook.

Round 2: (INC, SC) 2 times [6].

Round 3: SC Row [6].

Round 4: (INC, 2 SC) 2 times [8].

Round 5: SC row [8].

Round 6: (INC, 3 SC) 2 times [10].

Round 7: SC row [10].

Round 8: (INC, 4 SC) 2 times [12].

Round 9: (SC, INC) 6 times [18].

Rounds 10-12: 3 rows SC [18 stitches each row].

Round 13: (DEC, 1 SC) 6 times [12].

SC opening together.

Sew to the starting row.


HAIR

Frostina only

Cut several strands of diamond fifteen inches long. Fold in half and attach with a slip stitch.


Leave the first two rows without hair to sew the head flames on.


I prefer to attach hair every other row.


After you attach the head flames, you can add some more hairs to fill in any visible bald spots.


MOUTHMake one

Both have the same mouth it is just turned a different direction.


In Black

Ch 7

Round 1: SL ST, SC, HDC, DC, TC, DTC, CH 1.

Fasten off. There will be a point that you should curve under before sewing to the monster.

Emoji Imp Pillow – Video Tutorial

Crochet Emoji Imp

Crochet Emoji Imp

My husband won. (not completely, he wanted the poop emoji).

Crochet Emoji Pillow
Pirate emoji

I’m working on converting my content. This is available on Youtube or you can watch it below. You can buy the pattern as well. Emoji Imp Crochet Pattern – Drunken Aunt Wendy % (drunkenauntwendydesigns.com)

I’ve already started on the next monster set and they are quite hot and cold.

Crochet Monster
Sparky