Mystery Crochet Along

Crochet Narwhal Pattern

I am so sorry. This was supposed to be up over a week ago, but I got sick, then my husband got sick. Basically, we have been a walking plague these past two weeks.

I reworked the Champagne Cork Ornaments for Easter.


One chick and his hoppers!
Look at those tails!

Sheldon was finally tested and typed.

Sheldon assembled!

He even got new colors. I’m also working on more kits.

Sheldon in kit form.

I don’t like having to buy a ton of yarn just to make one little thing. Kits are perfect so I have just enough. I simply can’t throw away unused yarn. I have little fiddly bits all over the place.

Cecilia has been reworked and will soon be available as a pattern.

All eyelashes and charm.

She’s part of my cuddly aquarium series.

Oh Mystery Crochet A-long, Ha! This pattern has been posted, but it has not been tested. There were some great guesses on Facebook. I’m excited to try a lot of the suggestions, especially Bob Ross. He just would be a fun little plushie to sit on my desk and mellow me out.

Here’s how this will work. Today I’ll post the materials and on Friday I’ll post the first part of the pattern. It might be super obvious who we are making as soon as I tell the materials, but I hope this will be fun.

Materials

I love this yarn – Orange Neon
I love this yarn – White
10.5 m Safety eyes
Size E crochet hook
Large eye blunt needle
Polyfiberfill

Polliwag – Free Pattern

Polliwag Crochet Pattern


img_2140
Gryffindor refused to look at that the camera.


I added a few new hat colors inspired by Harry Potter Houses.

Reminder tomorrow is the last day to vote for Beebs, Clyde, Mango and Tango and Sparky and Frostina. Please help me out and vote.

But really you are probably here for the free pattern.

img_1784

Polliwag was interesting. I learned how to make a 2 color spiral and a crochet I-cord.

Enjoy!

Materials

Worsted Weight Yarn

I love this yarn – Medium Blue

I love this yarn – Soft Pink

I love this yarn – White

I love this yarn – Black

Size E crochet hook

Polyfiberfill

Large Eye Needle


Abbreviations

SC – Single Crochet

HDC – Half Double Crochet

CH- Chain

FO – Fasten Off

SL ST – Slip Stitch

INC – Make two Single Crochet in Same Stitch

DEC – Single Crochet two stitches together

BLO – Back Loops Only

FLO – Front Loops Only


Note: Almost the entire project is worked in the round. Use a stitch marker or a scrap piece of yarn to mark the beginning of each row. Then you don’t have to count every row. Do not join unless instructed to.


Parentheses indicate a repeat. Repeat the stitches in the parentheses for the number of times indicated.


The bracketed number [] is the number of stitches at the end of each row.


I spread my increases out so there isn’t a seam on the finished piece. If you do not like this method, you can do regular increases.


See last page for alternative color options


If you have any questions, please feel free to email me at drunkenauntwendy@gmail.com.


BODY – in Medium Blue

CH 2

Round 1: 6 SC in 2nd CH from hook [6].

Round 2: INC in each stitch [12].

Round 3: (SC, INC)  6 times [18].

Round 4: (SC, INC, SC) 6 times [24].

Round 5: (3 SC, INC) 6 times [30].

Round 6: (2 SC, INC, 2 SC) 6 times [36].

Rounds 7-11: 5 rows SC [36 stitches per row].

Round 12: (5 SC, INC) 6 times [42].

Rounds 13-18: 6 rows SC [42 stitches per row].

Round 19: (3 SC, INC, 3 SC) 6 times [48].

Rounds 20-26: 7 rows SC [48 stitches per row].

Round 27: (6 SC, DEC) 6 times [42].

Round 28: (5 SC, DEC) 6 times [36].

Round 29: (4 SC, DEC) 6 times [30].

Round 30: (3 SC, DEC) 6 times [24].

Start stuffing

Round 31: (2 SC, DEC) 6 times [18].

Round 32: (SC, DEC) 6 times [12].

Round 33: DEC 6 times [6].

Fasten off thread tail through stitches from last round and pull up tight to close hole.


FEET (Make 2) in Medium Blue

Ch 4

Round 1: SC in 2nd Ch, SC in next 2 stitches. 3 SC in last stitch, working in the unused loops from the chain, SC 2, 3 SC in last chain. [12].

Round 2: 3 SC, 3 INC, 3 SC, 3 INC [18].

Round 3: 3 SC (SC, INC) 3 times, 3 SC (SC, INC) [24].

Round 4: SC in BLO [24].

Round 5: 2 SC, 5 DEC, 3 SC, 3 DEC, SC [14].

Round 6: SC row [14].

Stuff foot

Round 7: DEC 7 times [7].

Round 8: 5 SC, DEC [6].

Rounds 9-11: 3 rows SC [6 stitches per row].

Stuff legs firmly and sew to bottom of the body. The legs need to be stuffed firmly to make Polliwag stand.


MOUTH in Soft Pink

Ch 4

Round 1: SC in 2nd Ch from hook and in next stitch, 3 SC in last stitch, using the unused loops from the 1st 2 stitches SC 2, 3 SC in the end [10].

Fasten off. Curve slightly and sew to body over the belly patch.


EYES  (Make 2)

Starting in Black

Ch 2

Round 1:  6 SC in 2nd Ch from hook, change colors to white [6].

Round 2: SC, 2 HDC in next stitch, 2 HDC in next stitch, SC (this is not a complete row) [8]

Fasten off and sew to body


STOMACH PATCH (Spiral)

Note: I will explain this as best I can, but if you don’t understand you can google for a YouTube tutorial.

Ch 2 in Black

Step 1:  3 SC in 2nd Ch from hook, remove hook from work leaving a large loop so you don’t lose your stitch [3].

Step 2: Join white opposite black and SC 3, working in the black stitches INC in each stitch, remove hook [9].

Step 3: Using black INC 3 times in the white stitches, (SC, INC) until you get to the end of the white stitches, drop black [15].

Step 4: Using white (SC, INC) 3 times and then (2 SC, INC) 3 times, drop white [21].

Step 5: Using Black (2 SC, INC) 3 times and then (3 SC, INC) 3 times, Fasten off Black [27]

Step 6: Using White (3 SC, INC) 3 times and then (4 SC, INC) 3 times, join to close the circle with a slip stitch [33].

Fasten off and sew to body.


FLAT PART of tail

In White

Ch 2

Round 1: 6 SC in 2nd Ch from hook [6].

Round 2: INC 6 times [12].

Round 3: (SC, INC) 6 times [18].

Round 4: (SC, INC, SC) 6 times [24].

Rounds 5-9: 5 rows SC [24 stitches per row].

Round 10: (DEC, 10 SC) 2 times [22].

Round 11: SC row [22].

Round 12: (DEC, 9 SC) 2 times [20].

Round 13: SC row [20].

Round 14: (DEC, 8 SC) 2 times [18].

Round 15: SC row [18].

Round 16: (DEC, 7 SC) 2 times [16].

Round 17: (DEC, 6 SC) 2 times [14].

Round 18: (DEC, 5 SC) 2 times [12].

Round 19: (DEC, 4 SC) 2 times [10].

Round 20: (DEC, 3 SC) 2 times [8].

You want to flatten the tail

Round 21: (DEC, 2 SC) 2 times [6].

Round 22: (DEC, SC) 2 times [4].

Fasten off. Sew opening closed.

Using Medium Blue sew a vein down the center of the tail.


TAIL ATTACHMENT in Blue

Crochet a 4 stitch i-cord for two inches.

For instructions see:


http://www.redheart.com/learn/articles/how-crochet-icord


Sew to skinny edge of the flat part and to the body.


Polliwag is all done.


img_1786
Look at that tail.


Free Pattern – Vulpix

Vulpix Crochet Pattern

I know I made the Pokémon toys awhile ago. It is taking me awhile to get them typed.

IMG_1853.JPG

Just got Vulpix typed. The picture isn’t fabulous, but she is ready for all who wish to crochet her. And hopefully in time for the holidays. I know I still need to get Polliwag and Jigglypuff typed.

Please keep in mind that this pattern has not been tested. If you have problems or questions, email me or comment and I will try to assist you. Follow the link vulpix for a .pdf of the pattern. Please let me know if there are any problems. Make sure you use #drunkenauntwendy so I can find your finished items.

I’ve entered Sparky, Frostina and Clyde in a Design Contest. It is all about Monsters and there are some super cute ones on here. Vote for me starting December 3. Remember you can only vote once and they usually have you vote for up to five. I may enter another one in tomorrow.


Free Pattern – Q-bert

Crochet q-bert

I’ve been busy. I was working feverishly on Nosferatu to get him done before Halloween.

img_1922

Sadly, I had the prototype done but didn’t have it tested. He’s all tested now. I really like giving things creepy white eyes. I haven’t been able to find white plastic eyes, so I just spray paint a pair in the appropriate diameter using a paint with a satin finish. I think the satin finish gives them a decidedly flat and creepy look. The pattern for Nosferatu is up for sale on Ravely, Craftsy and Etsy. I even made a kit.

I like kits as I don’t have to find the yarn colors, notions, etc. I also don’t have to buy a whole skein when I only need a few yards of a color. Let’s be honest, I usually don’t mind buying an extra ball of yarn here and there, but I’m supposed to be cutting down my stash and only buying what I need. Hence a kit. If you want to make your very own creature of the night, you can pick up the kit on Etsy as well.

Now I titled this blog free pattern and I haven’t even started talking about any pattern. What is wrong with me?

img_1339

It’s Q-bert. I love 80’s pop culture referenced and I totally remember watching this cartoon as a kid. I didn’t play the game that much. Isn’t he just adorable with his snout and big eyes. He does stand on his own, but it takes some manipulation to get the balance right. He tends to be the tiniest bit top heavy.

Before I keep rambling, here’s the Pattern.  It hasn’t been tested so if there are problems, please let me know. If there is anything confusing, let me know that as well.

I’m working on a turkey I have affectionately named Chief Featherbrain.

IMG_2052.JPG

His one foot just wants to hang out all wonky. He’s being tested now and hopefully, I’ll have his pattern up soon.

Then it’s on to Christmas Crochet. I’m trying to decide between Yukon Cornelius, The bumble, Hermie or Ralphie from A Christmas Story.

Oh and I also entered a contest with Clyde. 2015-07-06 21.34.50-2

Rawr!

I’ll post more details later on how to vote. I’m trying to get up a few more monsters entered into the contest before the deadline.

Happy Crocheting.

Pikachu Hats for Cats – and sometimes dogs.

pikachu cat hat crochet pattern

Pokémon Go fever has taken over, at least in our house. I got an odd request over Facebook. “Can you make a Pikachu Hat for a cat for a gift?” Not one to back down from a challenge, I happily accepted.

IMG_1769

It looks a little silly without a cat in it, but it ended up working really well.

Here is Lucky. IMG_1771

She’s exceedingly unimpressed with this. I’m lucky she didn’t bite me.

My Chihuahua wanted to join in on the fun.

IMG_1776

Then he kept trying to shake it off. Silly Weeble.

Would you like to make a hat for your cat or possibly a small dog? You are in luck.

I typed up the pattern. Make a hat, put it on a cat and send me a pic. Here’s a link to the pattern: pickachu-hat


Topsy Turvy – Free Pattern

Crochet pattern


Topsy flips over to create his friend Turvy.  He was created to explore the idea of one creature flipping over to make a completely different stuffed friend. This little amigurumi is super cute no matter which way you turn him.


Materials


Worsted Weight Yarn


I love this yarn – Hot Orchid


I love this yarn – Graphite


I love this yarn – Black


18 MM Safety Eyes


Size E crochet hook


Polyfiberfill


Large Eye Needle


Small Sharp Embroidery Needle


Abbreviations


SC – Single Crochet


CH- Chain


FO – Fasten Off


SL ST – Slip Stitch


INC – Make two Single Crochet in Same Stitch


DEC – Single Crochet two stitches together


BLO – Back Loops Only


LS – Loop Stitch


LSINC – Loop Stitch Increase


Note: Entire project is worked in the round. Use a stitch marker or a scrap piece of yarn to mark the beginning of each row. Then you don’t have to count every row. Do not join unless instructed to.


Parentheses indicate a repeat. Repeat the stitches in the parentheses for the number of times indicated.


The bracketed number [] is the number of stitches at the end of each row.


I spread my increases out so there isn’t a seam on the finished piece. If you do not like this method, you can do regular increases.


I have not included a step by step tutorial on how to do a loop stitch. Here is a helpful tutorial on Crochet Me’s website. http://www.crochetme.com/forums/t/28870.aspx


If you have any questions, please feel free to email me at drunkenauntwendy@gmail.com.


HEAD/BODY – in Graphite


Note: The head is started in Loop Stitch. As Loop Stitch shows on the wrong side of the fabric, you will reverse your stitching to end up on the right side when you start single crocheting. Work a Loop Stitch Increase by doing two Loop Stitches in the same stitch. 


 Ch 2


Round 1: 6 SC in 2nd Ch from hook [6].


Round 2: LSINC in each stitch around [12 LS].


Round 3: (LS, LSINC) 6 times [18 LS].


Round 4: (LS, LSINC, LS) 6 times [24 LS].


Round 5: (3 LS, LSINC) 6 times [30 LS].


Round 6: (2 LS, LSINC, 2 LS) 6 times [36 LS].


Round 7: You will be changing colors to Hot Orchid in the last stitch of this row.


(5 LS, LSINC) 6 times [42 LS].


Round 8: Turn the work so the right side (the loops) are facing outward  Reminder the rest of the creature is worked in single crochet. (3 SC, INC, 3 SC) 6 times [48].


Round 9: (7 SC, INC) 6 times [54].


Rounds 10-23: SC in each stitch for 14 rows [54 SC per row].


Round 24: (7 SC, DEC) 6 times [48].


Round 25: (6 SC, DEC) 6 times [42].


Place Eyes between Rows 16 and 17 approximately 7 stitches apart. This should be right underneath the hair.


Embroider the face using the pictures as a guide. Hide the mouth for Turvy under the loops for the hair.


Start Stuffing. You want to stuff firmly and make sure that the stuffing doesn’t cause lumps on the outside of your creature.


Round 26: (5 SC, DEC) 6 times [36].


Round 27: (4 SC, DEC) 6 times [30].


Round 28: (3 SC, DEC) 6 times [24].


Round 29: (2 SC, DEC) 6 times [18].


Round 30: (SC, DEC) 6 times [12].


Round 31: (DEC) 6 times [6].


Fasten off leaving a 6-10 inch tail. Using the tail weave in and out of the last 6 stitches and pull tight to close up the hole.


ARMS– in Hot Orchid (make 2)


Ch 2


Round 1: 6 SC in 2nd Chain from hook [6].


Round 2: SC row [6].


Round 3: SC row [6].


Round 4: (SC, INC) 3 times [9].


Round 5: SC Row [9].


Round 6: SC Row [9].


Round 7: (2 SC, INC) 3 times [12].


Round 8: SC Row [12].


Round 9: SC Row [12].


Round 10: SC Row [12].


Round 11: SC Row [12].


Round 12: SC Row [12].


Round 13: SC Row [12].


Round 14: SC Row [12].


Round 15: SC Row [12].


Round 16: SC Row [12].


Round 17: SC Row [12].


Fasten off and fold the arms flat. Sew to side of creatures between rows 9-10 in line with the eyes.


LEGS/ANTENNA – in Graphite (make 2)


Ch 2


Round 1:  6 SC in 2nd Chain from hook [6].


Round 2: (INC) 6 times [12].


Round 3: (SC, INC) 6 times [18].


Round 4: (SC, INC, SC) 6 times [24].


Round 5: SC row in BLO [24].


Round 6:  SC row [24].


Round 7: SC row [24].


Round 8: SC row [24].


Round 9: (2SC, DEC) 6 times [18].


Start stuffing


Round 10: (SC, DEC) 6 times [12]. Change colors to Hot Orchid in last stitch.


Round 11: SC row [12].


Round 12: SC row [12].


Fasten off and after it has been firmly stuffed sew to bottom of creature.


Sparky and Frostina – Free Pattern

Free Crochet Monster Pattern

Free Crochet Monster Pattern

I think these two might be my favorite. The pictures don’t show how sparkly she is. I also love their expressions and striped arms. Since they are hot and cold, Katy Perry music runs through my head when I look at them.

Look at all this sparkly hair.

dsc_9238.jpg

I also love how long I made the arms.

DSC_9246

Let me know if there are any problems or any of the instructions are unclear. They have not been tested. If you make one use #drunkenauntwendy when posting so I can find it.

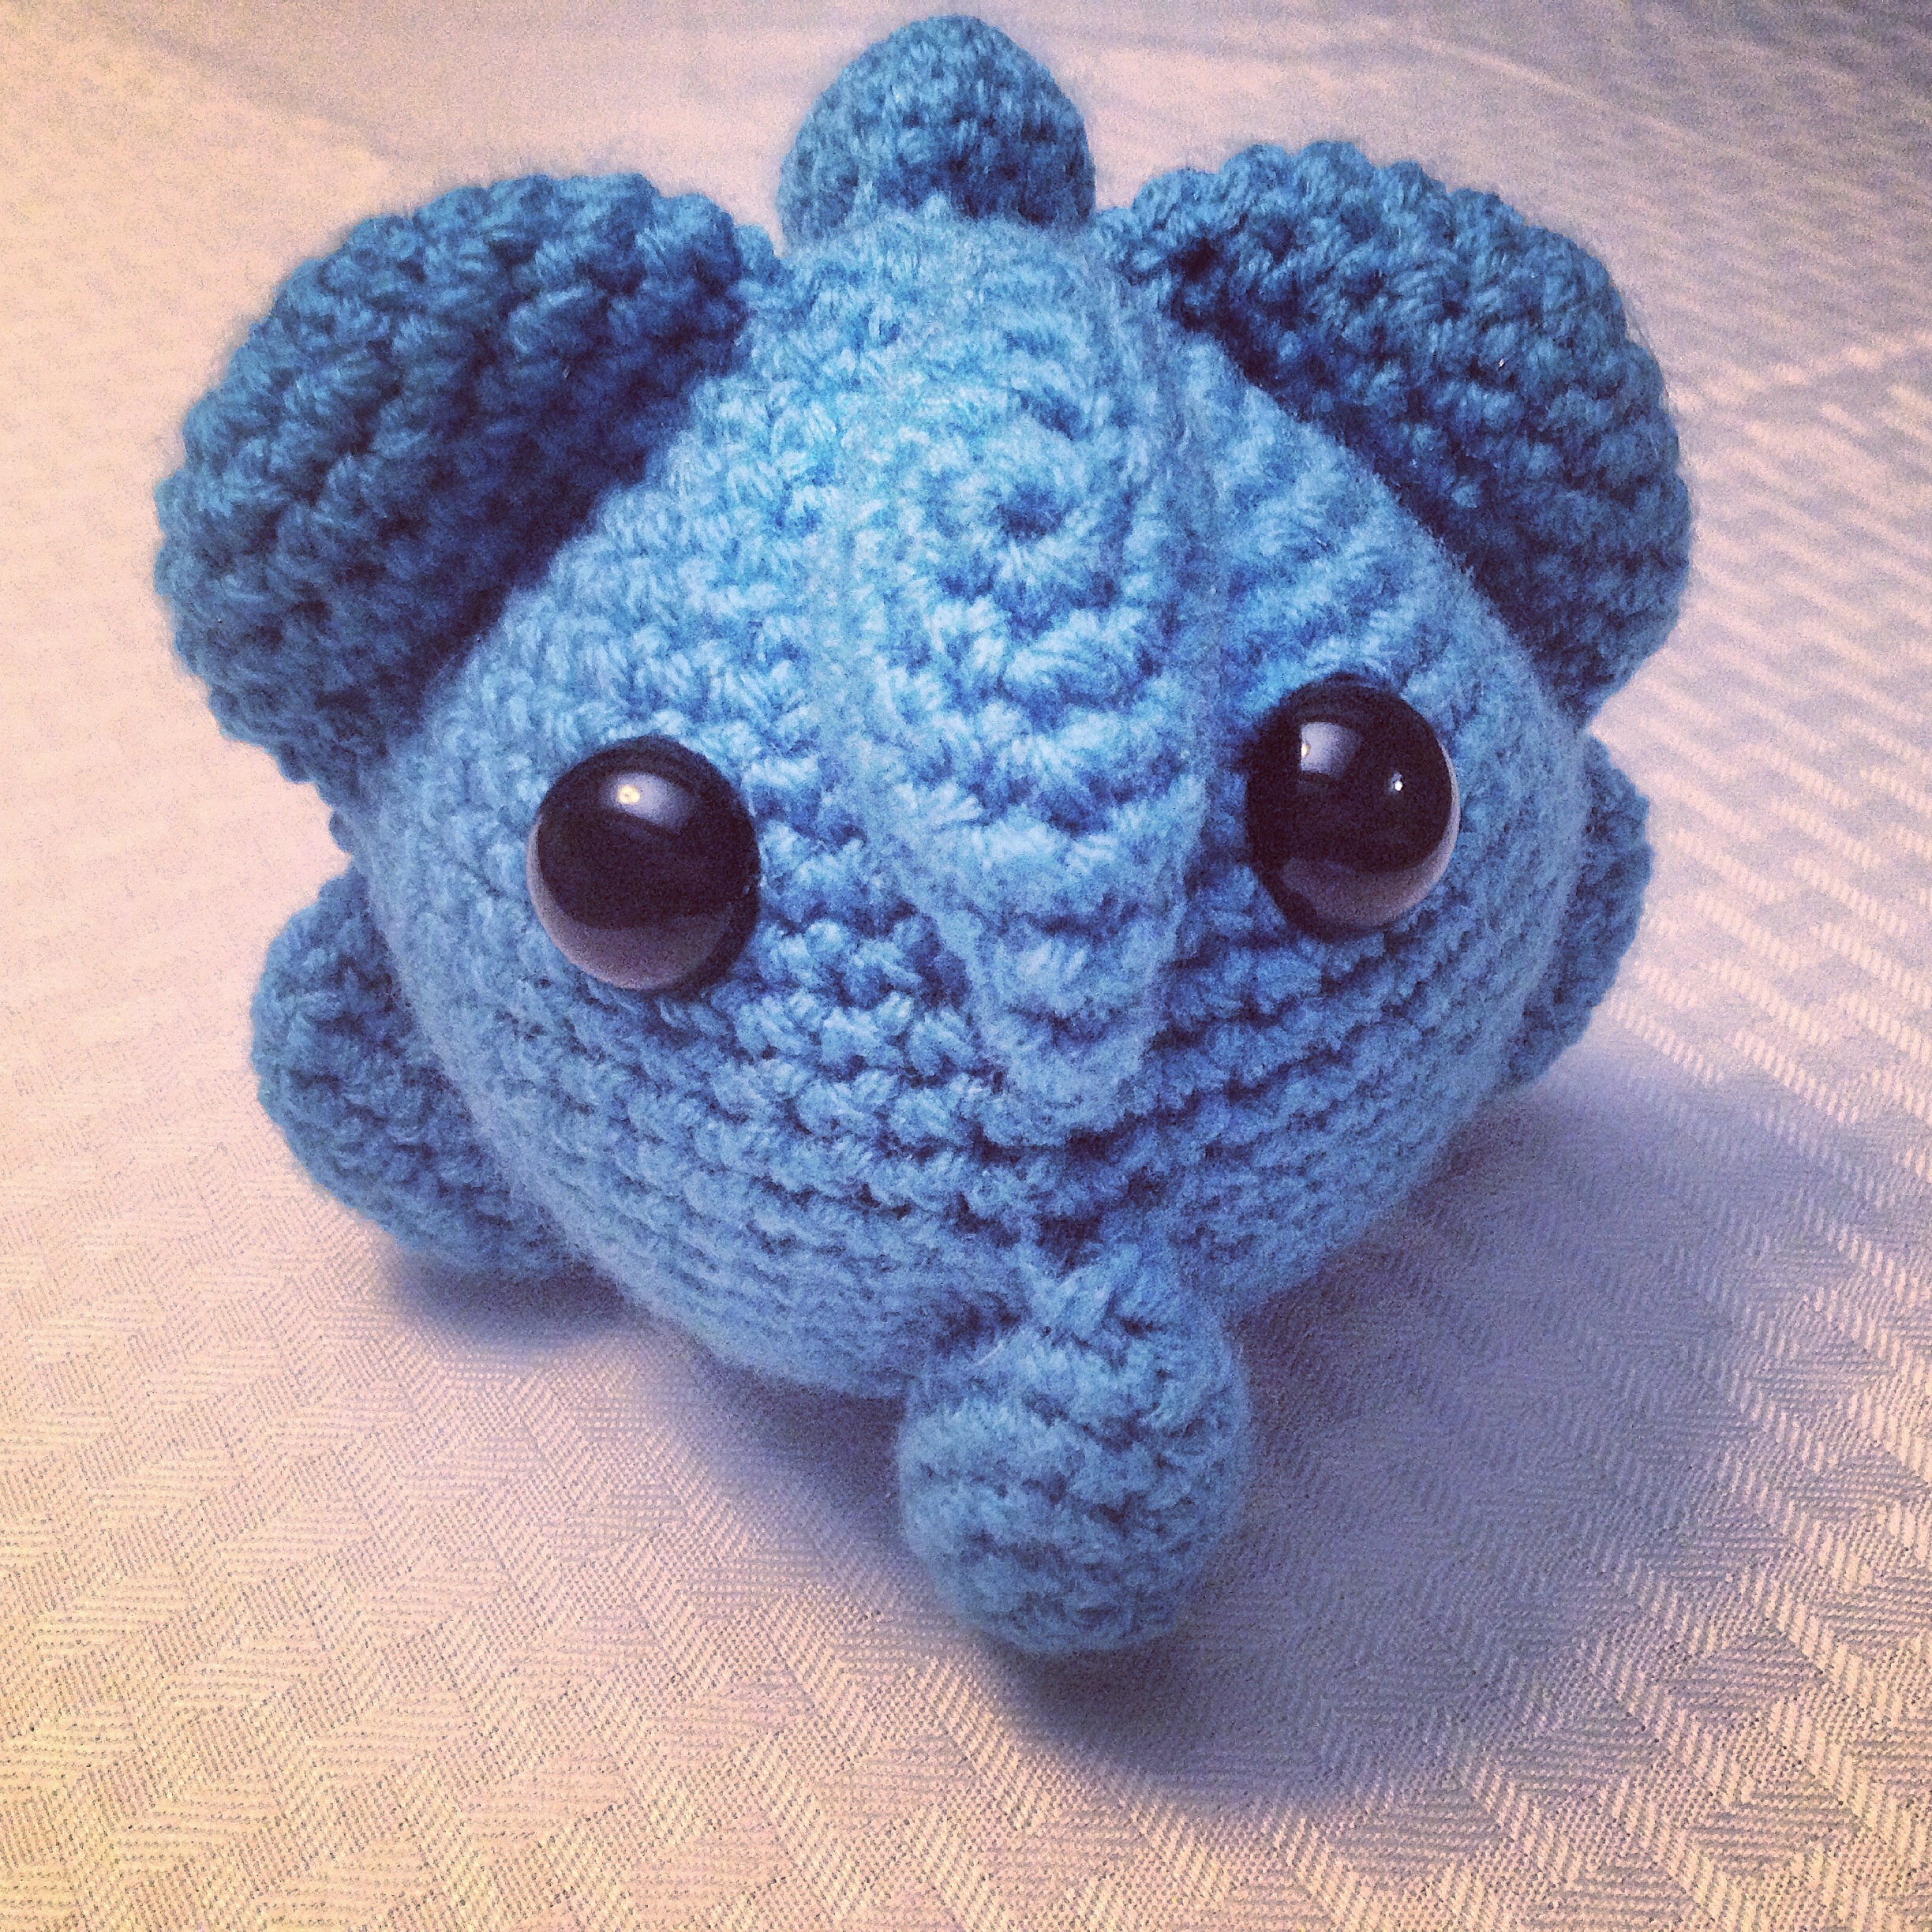
Sparky and Frostina, Monsters

© DrunkenAuntWendyDesigns 2015

Materials

Sparky

Worsted Weight Yarn

I love this yarn – Yellow

I love this yarn – Orange Neon

I love this yarn – Fire Red

Sport Weight Yarn

I love this cotton – White

I love this cotton – Black


Frostina

Worsted Weight Yarn

I love this yarn – Soft Blue

I love this yarn – Amethyst

Yarn Bee Fetching – Pewter

Yarn Bee Fetching – Diamond

Sport Weight Yarn

I love this cotton – White

I love this cotton – Black


Size E crochet hook

Polyfiberfill

Large Eye Needle


Abbreviations

SC – Single Crochet

HDC – Half Double Crochet

DC – Double Crochet

TC – Triple Crochet

DTC – Double Triple Crochet

CH- Chain

FO – Fasten Off

SL ST – Slip Stitch

INC – Make two Single Crochet in Same Stitch

DEC – Single Crochet two stitches together

BLO – Back Loops Only

Note: Entire project is worked in the round. Use a stitch marker or a scrap piece of yarn to mark the beginning of each row. Then you don’t have to count every row. Do not join unless instructed to.


Parentheses indicate a repeat. Repeat the stitches in the parentheses for the number of times indicated.


The bracketed number [] is the number of stitches at the end of each row.


I spread my increases out so there isn’t a seam on the finished piece. If you do not like this method, you can do regular increases.


If you have any questions, please feel free to email me at drunkenauntwendy@gmail.com.


BODY

Sparky – Fire Red

Frostina – Soft Blue


Ch 8

Round 1: SC in 2nd Ch, SC in next 5 stitches. 3 SC in last stitch. Working in the unused loops from the chain, SC 5, 3 SC in last chain. [18]

Round 2: [6 SC, (INC) 3 times] repeat bracket one more time [24].

Round 3: [6 SC, (SC, INC) 3 times] repeat bracket one more time [30].

Round 4: [6 SC, (SC, INC, SC) 3 times] repeat bracket one more time [36].

Round 5: [6 SC, (3 SC, INC) 3 times] repeat bracket one more time [42].

Round 6: [6 SC, (2 SC, INC, 2 SC) 3 times] repeat bracket one more time [48].

Note: Switches from oval increase to regular circle increase here

Round 7: (7 SC, INC) 6 times [54].

Round 8: (4 SC, INC, 4 SC) 6 times [60].

Rounds 9-32: SC in each stitch for 24 rows [60 stitches per row].

Round 33: In BLO (DEC, 8 SC) 6 times [54].

Round 34: (DEC, 7 SC) 6 times [48].

Round 35: (DEC, 6 SC) 6 times [42].

Round 36: (DEC, 5 SC) 6 times [36].

Start stuffing. Make sure you stuff firmly enough to hold the shape, but not too firmly that you stretch your stitches

Round 37: (DEC, 4 SC) 6 times [30].

Round 38: (DEC, 3 SC) 6 times [24].

Round 39: (DEC, 2 SC) 6 times [18].

Round 40: (DEC, 1 SC) 6 times [12].

Round 41: (DEC) 6 times [6].

Fasten off. Thread the tail through the opening and sew it up tight.


ARMS – make 2 for each monster

Both monsters’ arms are worked the same, no need to fasten off for color changes. Simply run the unused colors up the inside.


Sparky Stripe Pattern

           2 red

           2 orange

           2 yellow

           Repeat until the last four rows.

           Finish last four rows in red


Frostina Stripe Pattern

           3 Soft Blue

           1 Diamond

           3 Amethyst

           1 Diamond


Chain 2

Round 1: 6 SC in 2nd CH from hook.

Round 2: (INC) 6 times [12].

Round 3: (SC, INC) 6 times [18].

Round 4: (SC, INC, SC) 6 times [24].

Rounds 5-10: 6 rows SC [24 stitches each row].

Stuff only the ball of the arms.

Round 11: (DEC, 2 SC) 6 times [18].

Round 12: (DEC, 1 SC) 6 times [12].

Rounds 13-34: 22 rows SC [12 stitches each row].

SC opening closed with the last used color. Fasten off and leave a long tail to sew them on.

Sew to the arms to the sides of the body hanging low.


LEGS – Make 2

Sparky – Fire Red

Frostina – Soft Blue


CH 2

Round 1: 6 SC in 2nd CH from hook.

Round 2: (INC) 6 times [12].

Round 3: (SC, INC) 6 times [18].

Round 4: (SC, INC, SC) 6 times [24].

Round 5: (3 SC, INC) 6 times [30].

Round 6: In BLO, SC Row [30].

Round 7: (DEC, 3 SC) 6 times [24].

Rounds 8-11: 4 rows SC [24 stitches each row].

Round 12: In BLOs (DEC, 2 SC) 6 times [18].

Round 13: (DEC, 1 SC) 6 times [12].

Start stuffing here

Rounds 14-18: 5 rows SC [12 stitches each row].

Fasten off. Make sure they are stuffed tightly to support the weight of the monster.

Sew to the bottom of the body.


EYES – Make two for each monster

In white

Chain 2

Round 1: 6 SC in 2nd CH from hook.

Round 2: (INC) 6 times [12].

Round 3: (SC, INC) 6 times [18].

Round 4: (SC, INC, SC) 6 times [24].

Fasten off. Stretch to an oval shape before sewing.


PUPIL – Make two for each monster

In black

Chain 2

Round 1: 6 SC in 2nd CH from hook.

Slip stitch to close circle.

Sparky – sew pupils to bottom of oval

Frostina – sew pupils slightly off center looking in the same direction.


Sew eyes to the body. Eyelashes are optional.


HEAD FLAMES

Sparky – Make 1 yellow, 1 orange, 2 red

Frostina – Make one in Pewter and 2 in Pewter for the first 5 rows and Amethyst for the rest.


Chain 2

Round 1: 4 SC in 2nd CH from hook.

Round 2: (INC, SC) 2 times [6].

Round 3: SC Row [6].

Round 4: (INC, 2 SC) 2 times [8].

Round 5: SC row [8].

Round 6: (INC, 3 SC) 2 times [10].

Round 7: SC row [10].

Round 8: (INC, 4 SC) 2 times [12].

Round 9: (SC, INC) 6 times [18].

Rounds 10-12: 3 rows SC [18 stitches each row].

Round 13: (DEC, 1 SC) 6 times [12].

SC opening together.

Sew to the starting row.


HAIR

Frostina only

Cut several strands of diamond fifteen inches long. Fold in half and attach with a slip stitch.


Leave the first two rows without hair to sew the head flames on.


I prefer to attach hair every other row.


After you attach the head flames, you can add some more hairs to fill in any visible bald spots.


MOUTHMake one

Both have the same mouth it is just turned a different direction.


In Black

Ch 7

Round 1: SL ST, SC, HDC, DC, TC, DTC, CH 1.

Fasten off. There will be a point that you should curve under before sewing to the monster.

Emoji Imp Pillow – Video Tutorial

Crochet Emoji Imp

Crochet Emoji Imp

My husband won. (not completely, he wanted the poop emoji).

Crochet Emoji Pillow
Pirate emoji

I’m working on converting my content. This is available on Youtube or you can watch it below. You can buy the pattern as well. Emoji Imp Crochet Pattern – Drunken Aunt Wendy % (drunkenauntwendydesigns.com)

I’ve already started on the next monster set and they are quite hot and cold.

Crochet Monster
Sparky

Free Pattern – Beetsy the adorable beet

Free Crochet Beet pattern

2015-01-10 16.02.41

I’ve been working in this very cold weather. What a better thing to do when it is ice cold than sit inside and make creatures. I got the idea for this while I was working on Mr. Sniffles. Meet Beetsy. She’s a quick little pattern that can be made in a variety of colors. As I was going for beet, I made her purple. If you make her, make sure to use #drunkenauntwendy so I can find it.

Materials
Worsted Weight Yarn
I love this yarn – Hot Orchid (45 yds)
I love this yarn – Jelly Bean (20 yds)
Size 18 mm eyes
Size E crochet hook
Polyfiberfill
Large Eye Needle


Abbreviations
SC – Single Crochet
HDC – Half Double Crochet
CH- Chain
FO – Fasten Off
SL ST – Slip Stitch
INC – Make two Single Crochet in Same Stitch
DEC – Single Crochet two stitches together
BLO – Back Loops Only
FLO – Front Loops Only

Note: Almost the entire project is worked in the round. Use a stitch marker or a scrap piece of yarn to mark the beginning of each row. Then you don’t have to count every row. Do not join unless instructed to.

Parentheses indicate a repeat. Repeat the stitches in the parentheses for the number of times indicated.

The bracketed number [] is the number of stitches at the end of each row.

I spread my increases out so there isn’t a seam on the finished piece. If you do not like this method, you can do regular increases.

See last page for alternative color options

If you have any questions, please feel free to email me at drunkenauntwendy@gmail.com

BODY

In Hot Orchid, CH 2
Round 1: 4 SC in 2nd CH from hook [4].
Round 2-3: 2 rows SC [4 in each row].
Round 4: (SC, INC) 2 times [6].
Round 5: 1 row SC [6].
Round 6: (INC) 6 times [12].
Round 7: 1 row SC [12].
Round 8: (SC, INC) 6 times [18].
Round 9: 1 row SC [18].
Round 10: (SC, INC, SC) 6 times [24].
Round 11: 1 row SC [24].
Round 12: (3 SC, INC) 6 times [30].
Round 13: 1 row SC [30].
Round 14: (2 SC, INC, 2 SC) 6 times [36].
Round 15: 1 row SC [36].
Round 16: (5 SC, INC) 6 times [42].
Round 17: 1 row SC [42].
Round 18: (3 SC, INC, 3 SC) 6 times [48].
Rounds 19 – 24: SC in each stitch for 6 rows [48 stitches per row].
Place Eyes – use photo for placement
Round 25: (DEC, 6 SC) 6 times [42]
Round 26: (DEC, 5 SC) 6 times [36]
Round 27: (DEC, 4 SC) 6 times [30]
Start stuffing here. Stuff firmly.
Round 28: (DEC, 3 SC) 6 times [24]
Round 29: (DEC, 2 SC) 6 times [18]
Round 30: (DEC, 1 SC) 6 times [12]
Round 31: (DEC) 6 times [6]

FO leaving a long tail. Thread tail through last 6 stitches and pull up tight to close hole.

LEAVES (Make 3)

In Jelly Bean, Ch 2.

Round 1: 6 SC in 2nd chain from hook [6].
Round 2: INC in each stitch [12]
Round 3: (SC, INC) 6 times [18]
Round 4: (SC, INC, SC) 6 times [24]
Rounds 5-6: 2 rows SC [24 stiches in each row]
Fold leaf in half. SC opening together stuffing as you go. [12].
Sew to the top of her head as shown in the picture.

2015-01-10 15.41.19

Free Pattern – Mr. Sniffles

Free crochet cold virus pattern

It’s Mr. Sniffles. He’s the cold you want to catch. Mr. Sniffles is based on the microscopic view of the cold virus. At our house, we like to play Catch a Cold. (Hot potato with a cold virus). If you make him make sure to #drunkenauntwendy so I can find it and give you lots of love.

I have made other microbes; Mr. Sa – the MRSA super bug and Anthrax the cutest little biohazard along with Clem and Lydia Chlamydia, and Eggbert the Chicken Pox. Want to make Mr. Sniffles, but don’t have the supplies? There’s a kit for that.

Materials
Worsted Weight Yarn
I love this yarn – Blue Neon (100 yds)
18 mm Safety Eyes (2)
Size E crochet hook
Polyfiberfill
Large Eye Needle

Gauge: is not important for this project

Abbreviations
SC – Single Crochet
CH- Chain
FO – Fasten Off
SL ST – Slip Stitch
INC – Make two Single Crochet in Same Stitch
DEC – Single Crochet two stitches together

Note: Entire project is worked in the round. Use a stitch marker or a scrap piece of yarn to mark the beginning of each row. Then you don’t have to count every row. Do not join unless instructed to.

Parentheses indicate a repeat. Repeat the stitches in the parentheses for the number of times indicated.

The bracketed number [] is the number of stitches at the end of each row.

I spread my increases out so there isn’t a seam on the finished piece. If you do not like this method, you can do regular increases.

If you have any questions, please feel free to email me at drunkenauntwendy@gmail.com.

BODY – in Blue Neon

CH 2
Round 1: 6 SC in 2nd CH from hook.
Round 2: (INC) 6 times [12].
Round 3: (SC, INC) 6 times [18].
Round 4: (SC, INC, SC) 6 times [24].
Round 5: (3 SC, INC) 6 times [30].
Round 6: (2 SC, INC, 2 SC) 6 times [36].
Round 7: (5 SC, INC) 6 times [42].
Round 8: (3 SC, INC, 3 SC) 6 times [48].
Rounds 9 – 20: SC in each stitch around for 12 rows [48 stitches per row].
Round 21: (DEC, 6 SC) 6 times [42].
Round 22: (DEC, 5 SC) 6 times [36].
Round 23: (DEC, 4 SC) 6 times [30].
Place eyes between rows 10-11 approximately 9 stitches apart.

Start stuffing here. Stuff firmly.
Round 24: (DEC, 3 SC) 6 times [24].
Round 25: (DEC, 2 SC) 6 times [18].
Round 26: (DEC, 1 SC) 6 times [12].
Round 27: (DEC) 6 times [6].

FO leaving a long tail. Thread tail through last 6 stitches and pull up tight to close hole.

Bumps – Make 8 in Blue Neon

CH 2
Round 1: 6 SC in 2nd Chain from hook
Round 2: (INC) 6 times [12].
Round 3: (INC, 1 SC) 6 times [18].
Round 4: (SC, INC, SC) 6 times [24].
Round 5-6: SC in each stitch around for 2 rows [24 stitches per row].

FO leaving a long tail. Pull to enlongate into an oval shape. Use tail to sew to body along the top of his head, center one between the eyes.

Place three more bumps on the top of the head.

This shows how you should do the placement.

The remaining ones should go directly underneath.

Voila – one cold virus.